NER
Search > Models > NER
In order to train a successful NER model, it's essential to follow a structured approach. The following details provide a comprehensive guide on how to train a NER model:
Overview
Welcome to our NER Model Training page! Our NER model training service is specifically designed to extract entities/attribute fields such as brand, product type, and model name for your text data.
Our training flow consists of six stages/steps, making it easy to train and customize your own NER models to improve accuracy and performance for your specific use case:
Configure: Configure NER attribute fields such as brand, product type, and model name.
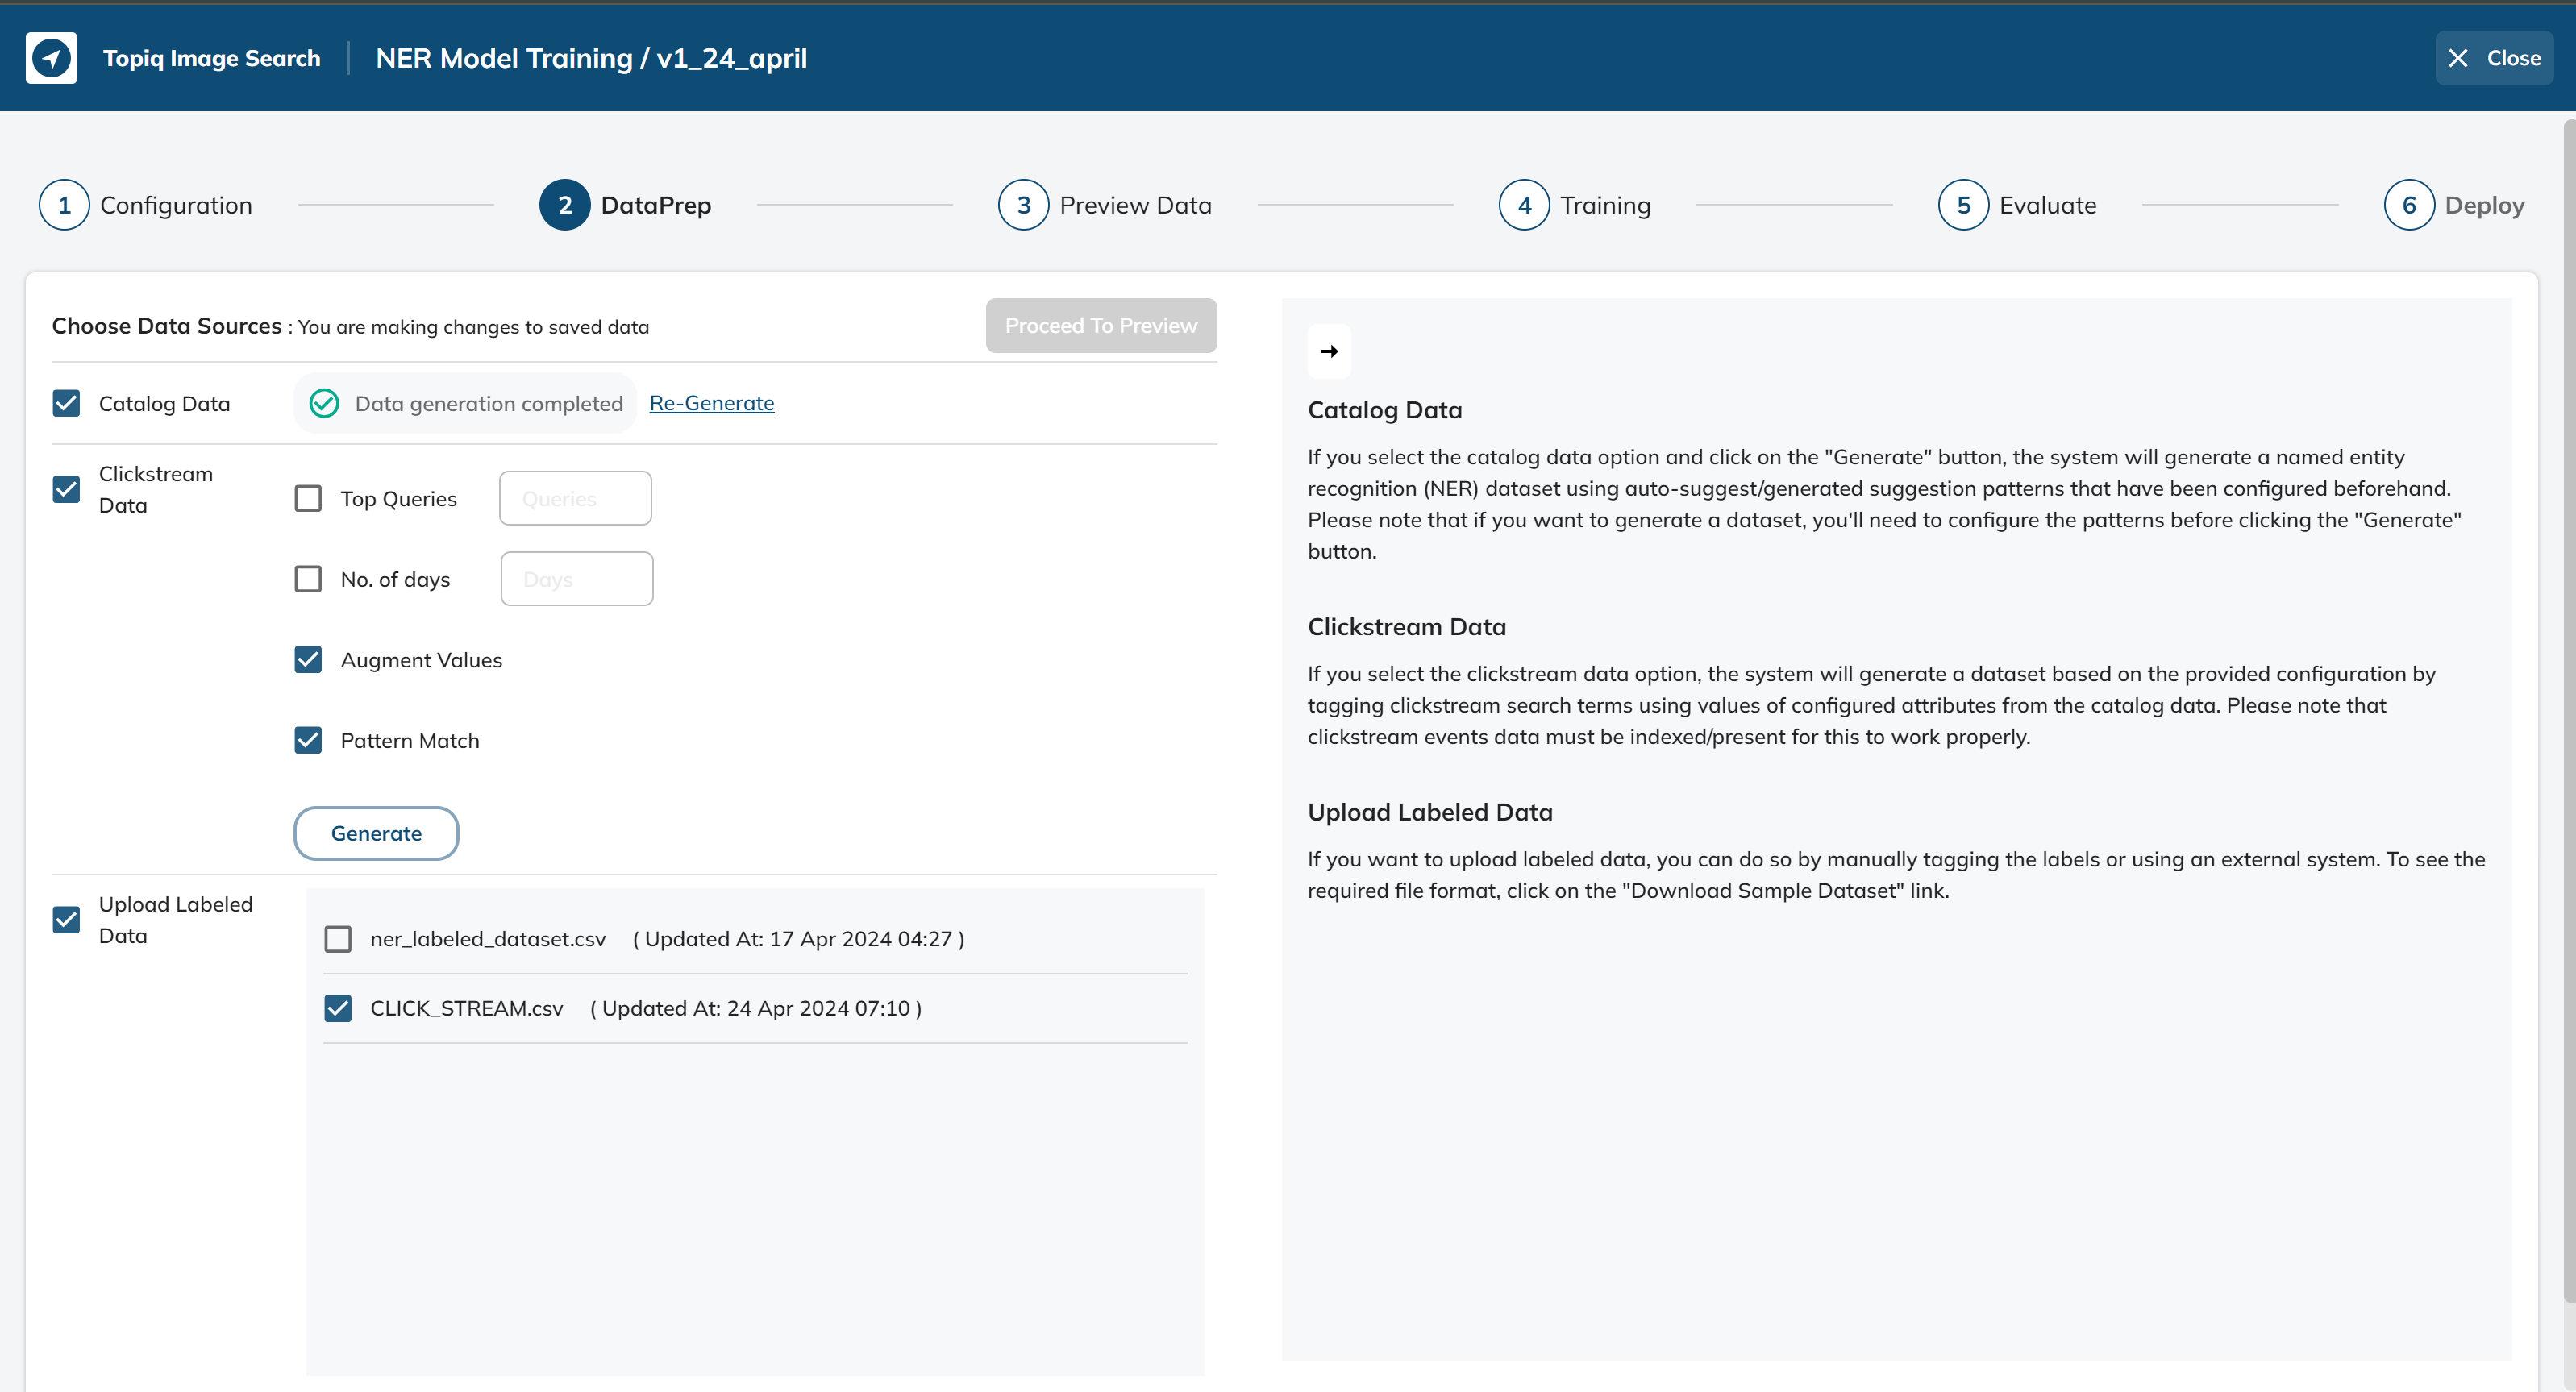
DataPrep: Generate datasets (using the catalog, click-stream data as a source) and/or select uploaded labeled datasets. You can select one or more datasets as needed for training.
Preview Data: Get insights into your selected datasets based on calculated statistical and other information. You can also export different previews.
Train: Select training parameters and start model training. See validation metrics as the model get trained.
Evaluate: Evaluate your trained model by generating metrics/reports on uploaded test files.
Deploy: Deploy your trained model to our inference service to start extracting entities for your text data.
Our platform provides access to powerful features such as data augmentation, active learning, and model evaluation to help you achieve the best possible results. With our NER model training service, you can:
->Train your own NER models using your data.
->Annotate entities in your text data to improve model accuracy.
->Monitor model performance and retrain models as needed to improve accuracy.
Get started today and take your entity extraction to the next level!
Configure NER Attributes
The first step in NER model training is to configure the attributes of the entities that we want to identify. These attributes could include things like entity names, types, valid values, value variations, etc
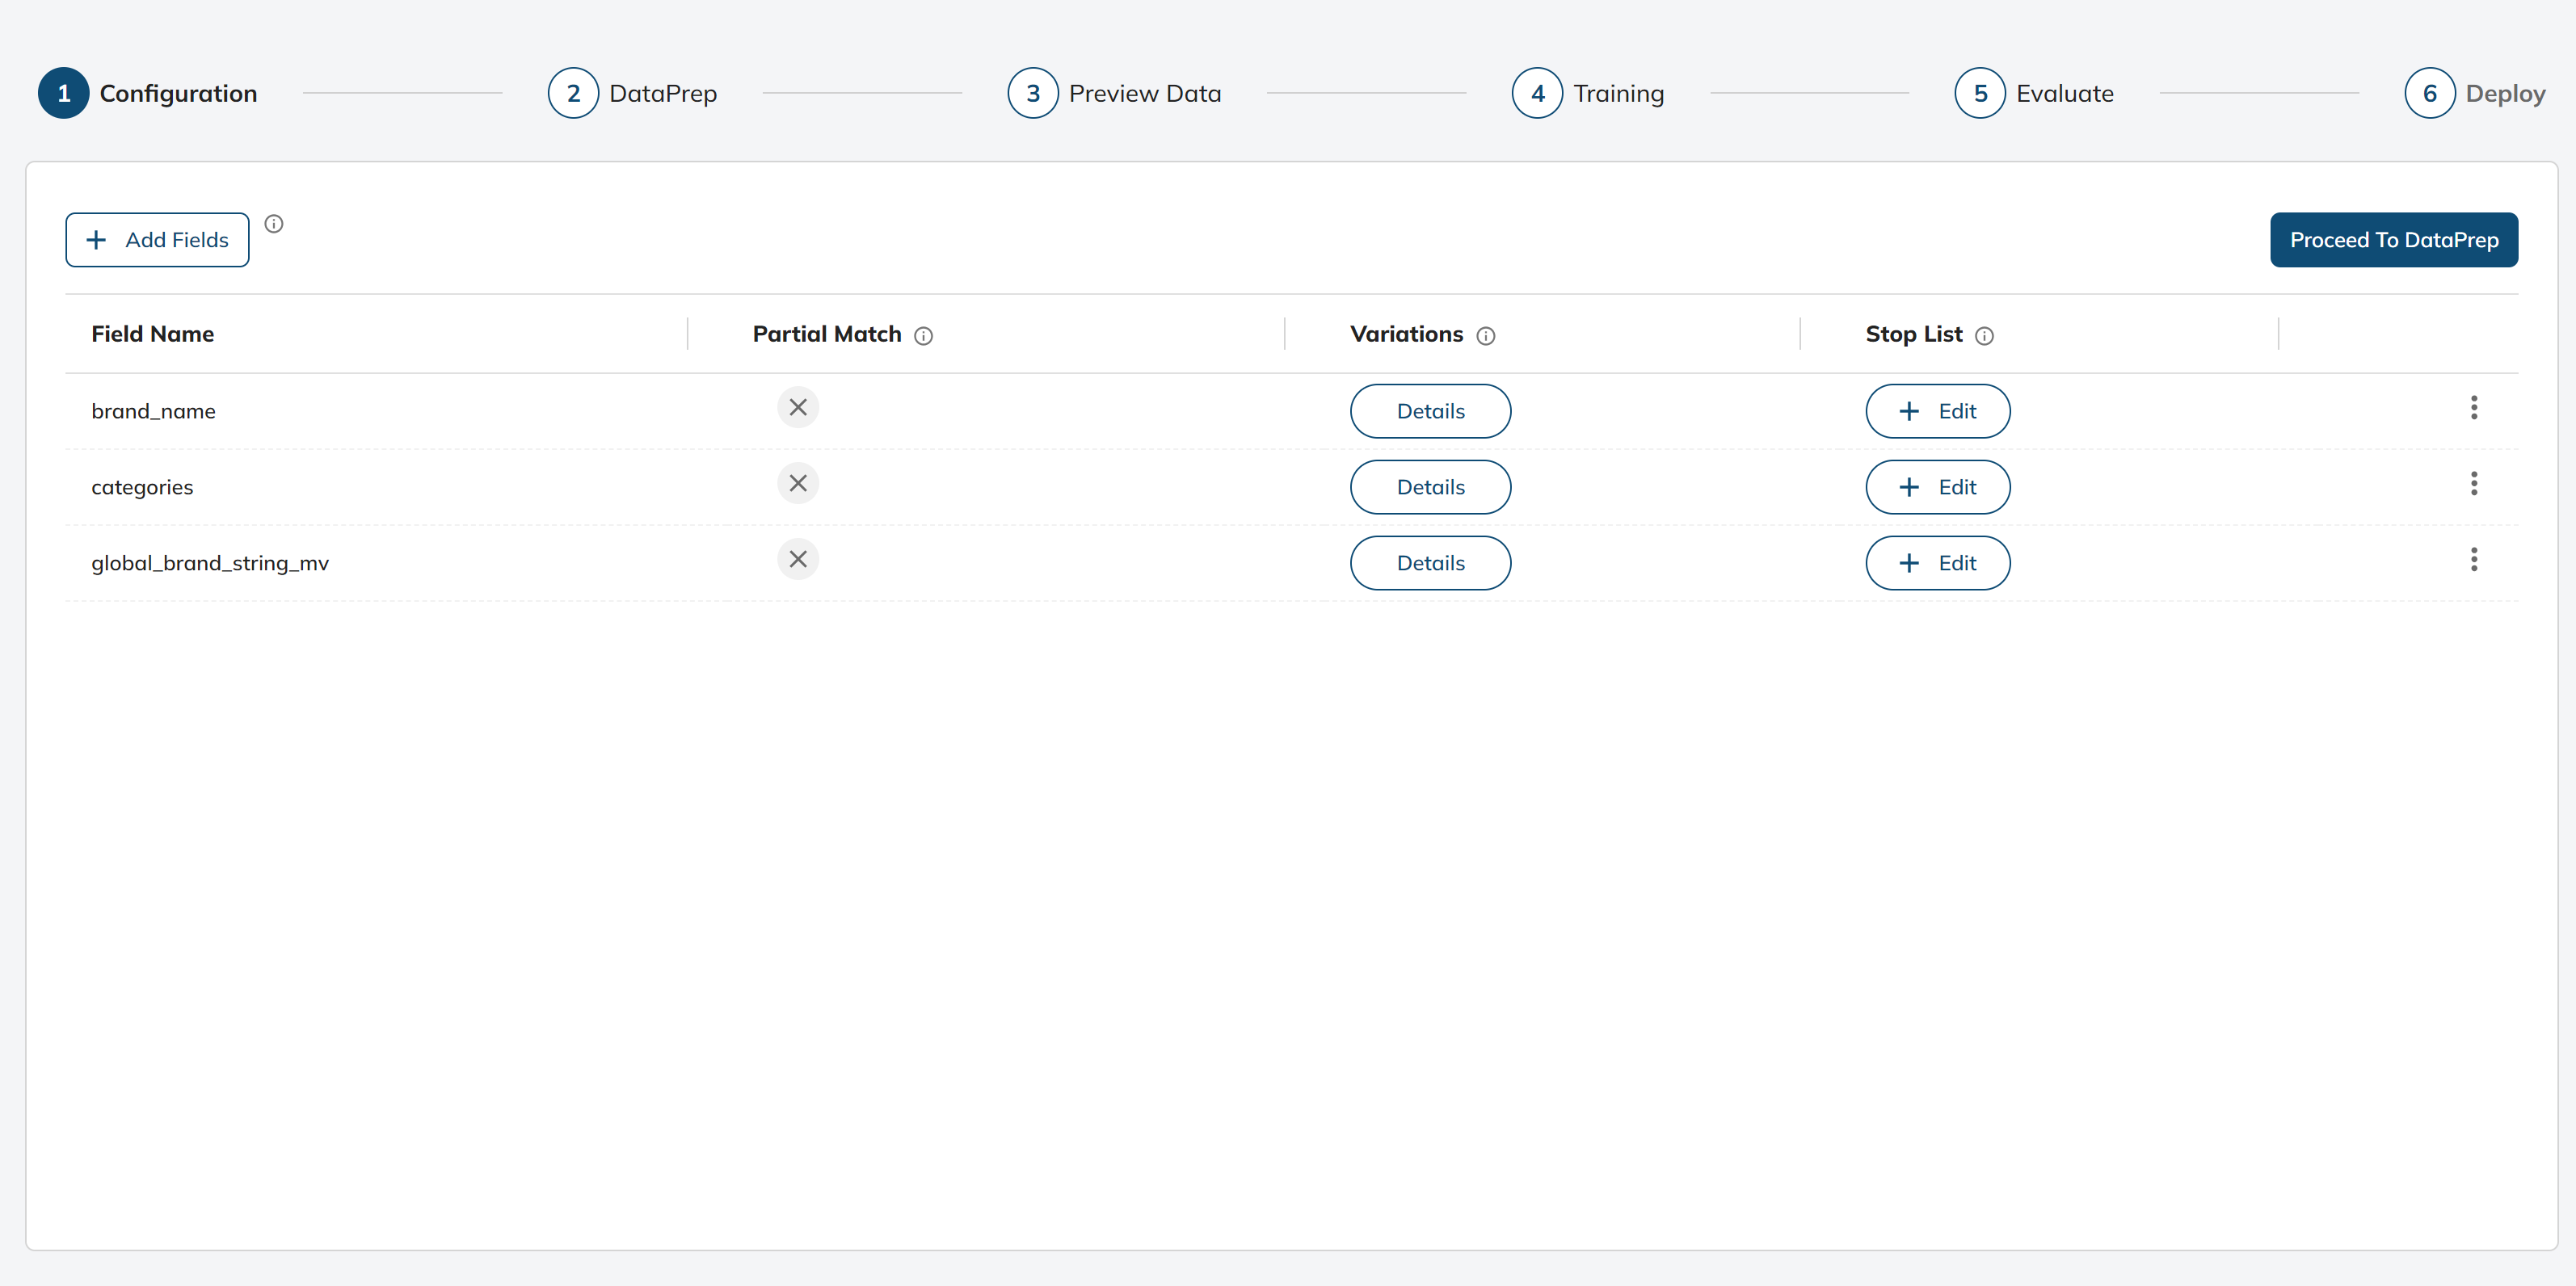
To add attributes first click on Add Fields Button:
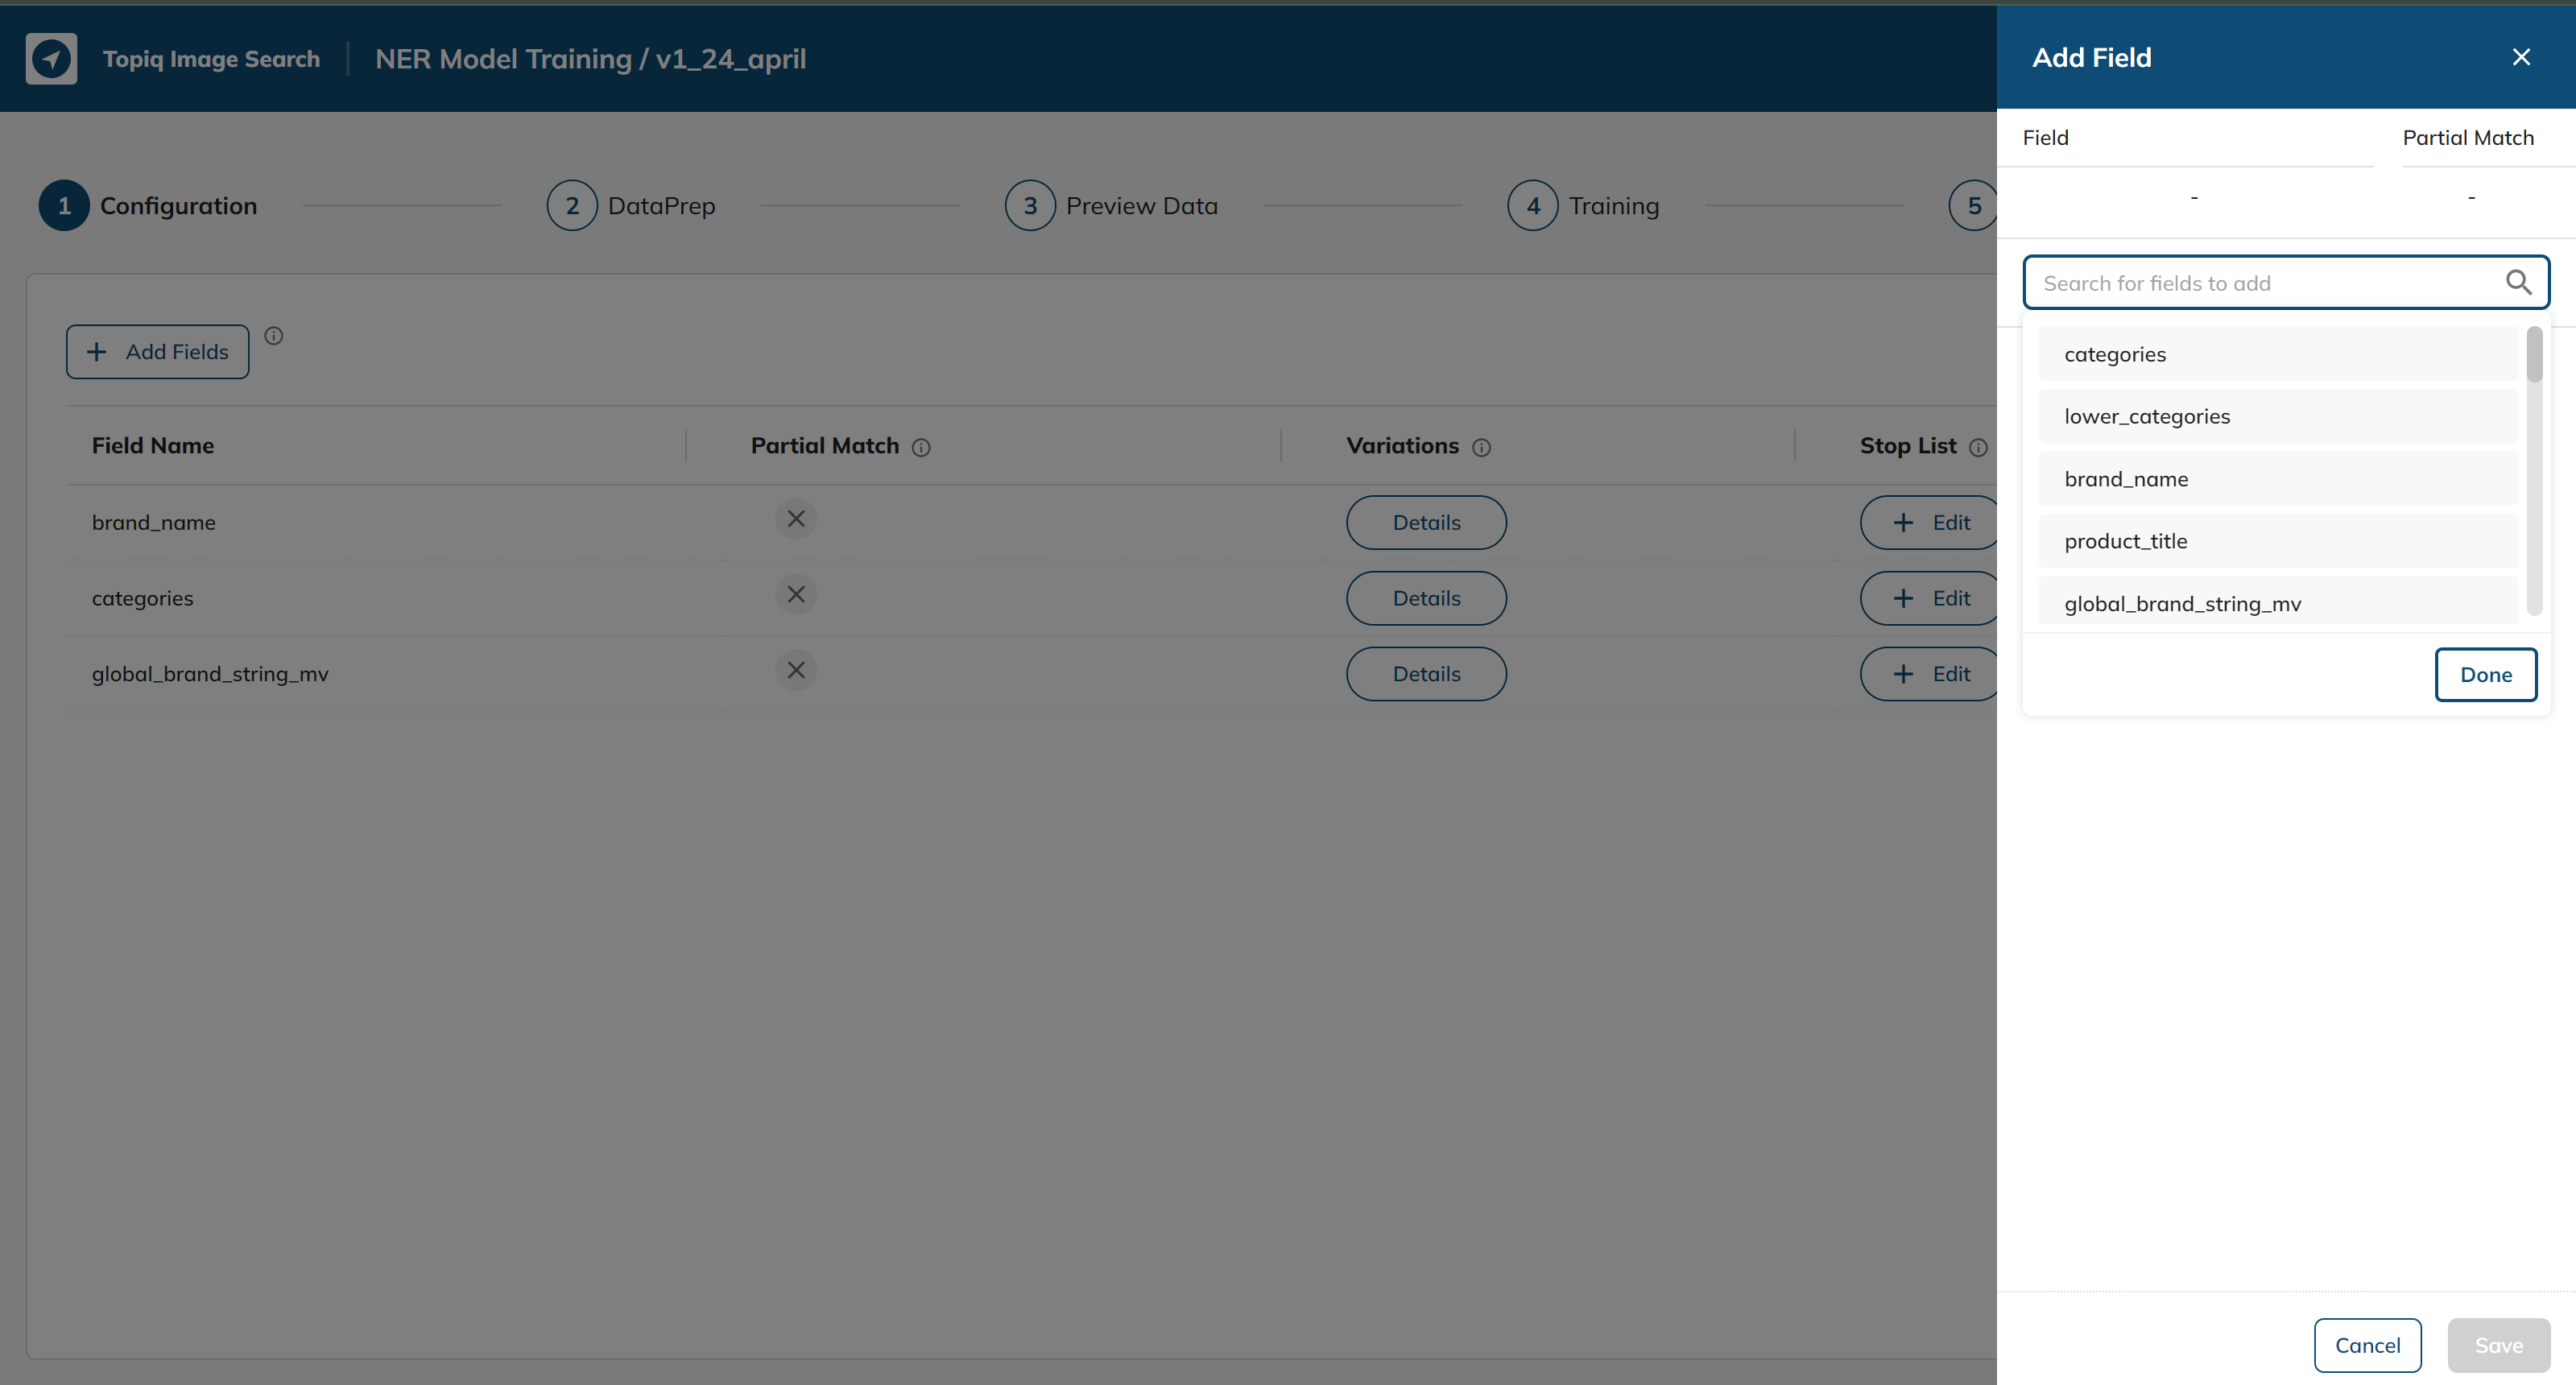
Select from the search bar (we will be selecting the product_title attribute):
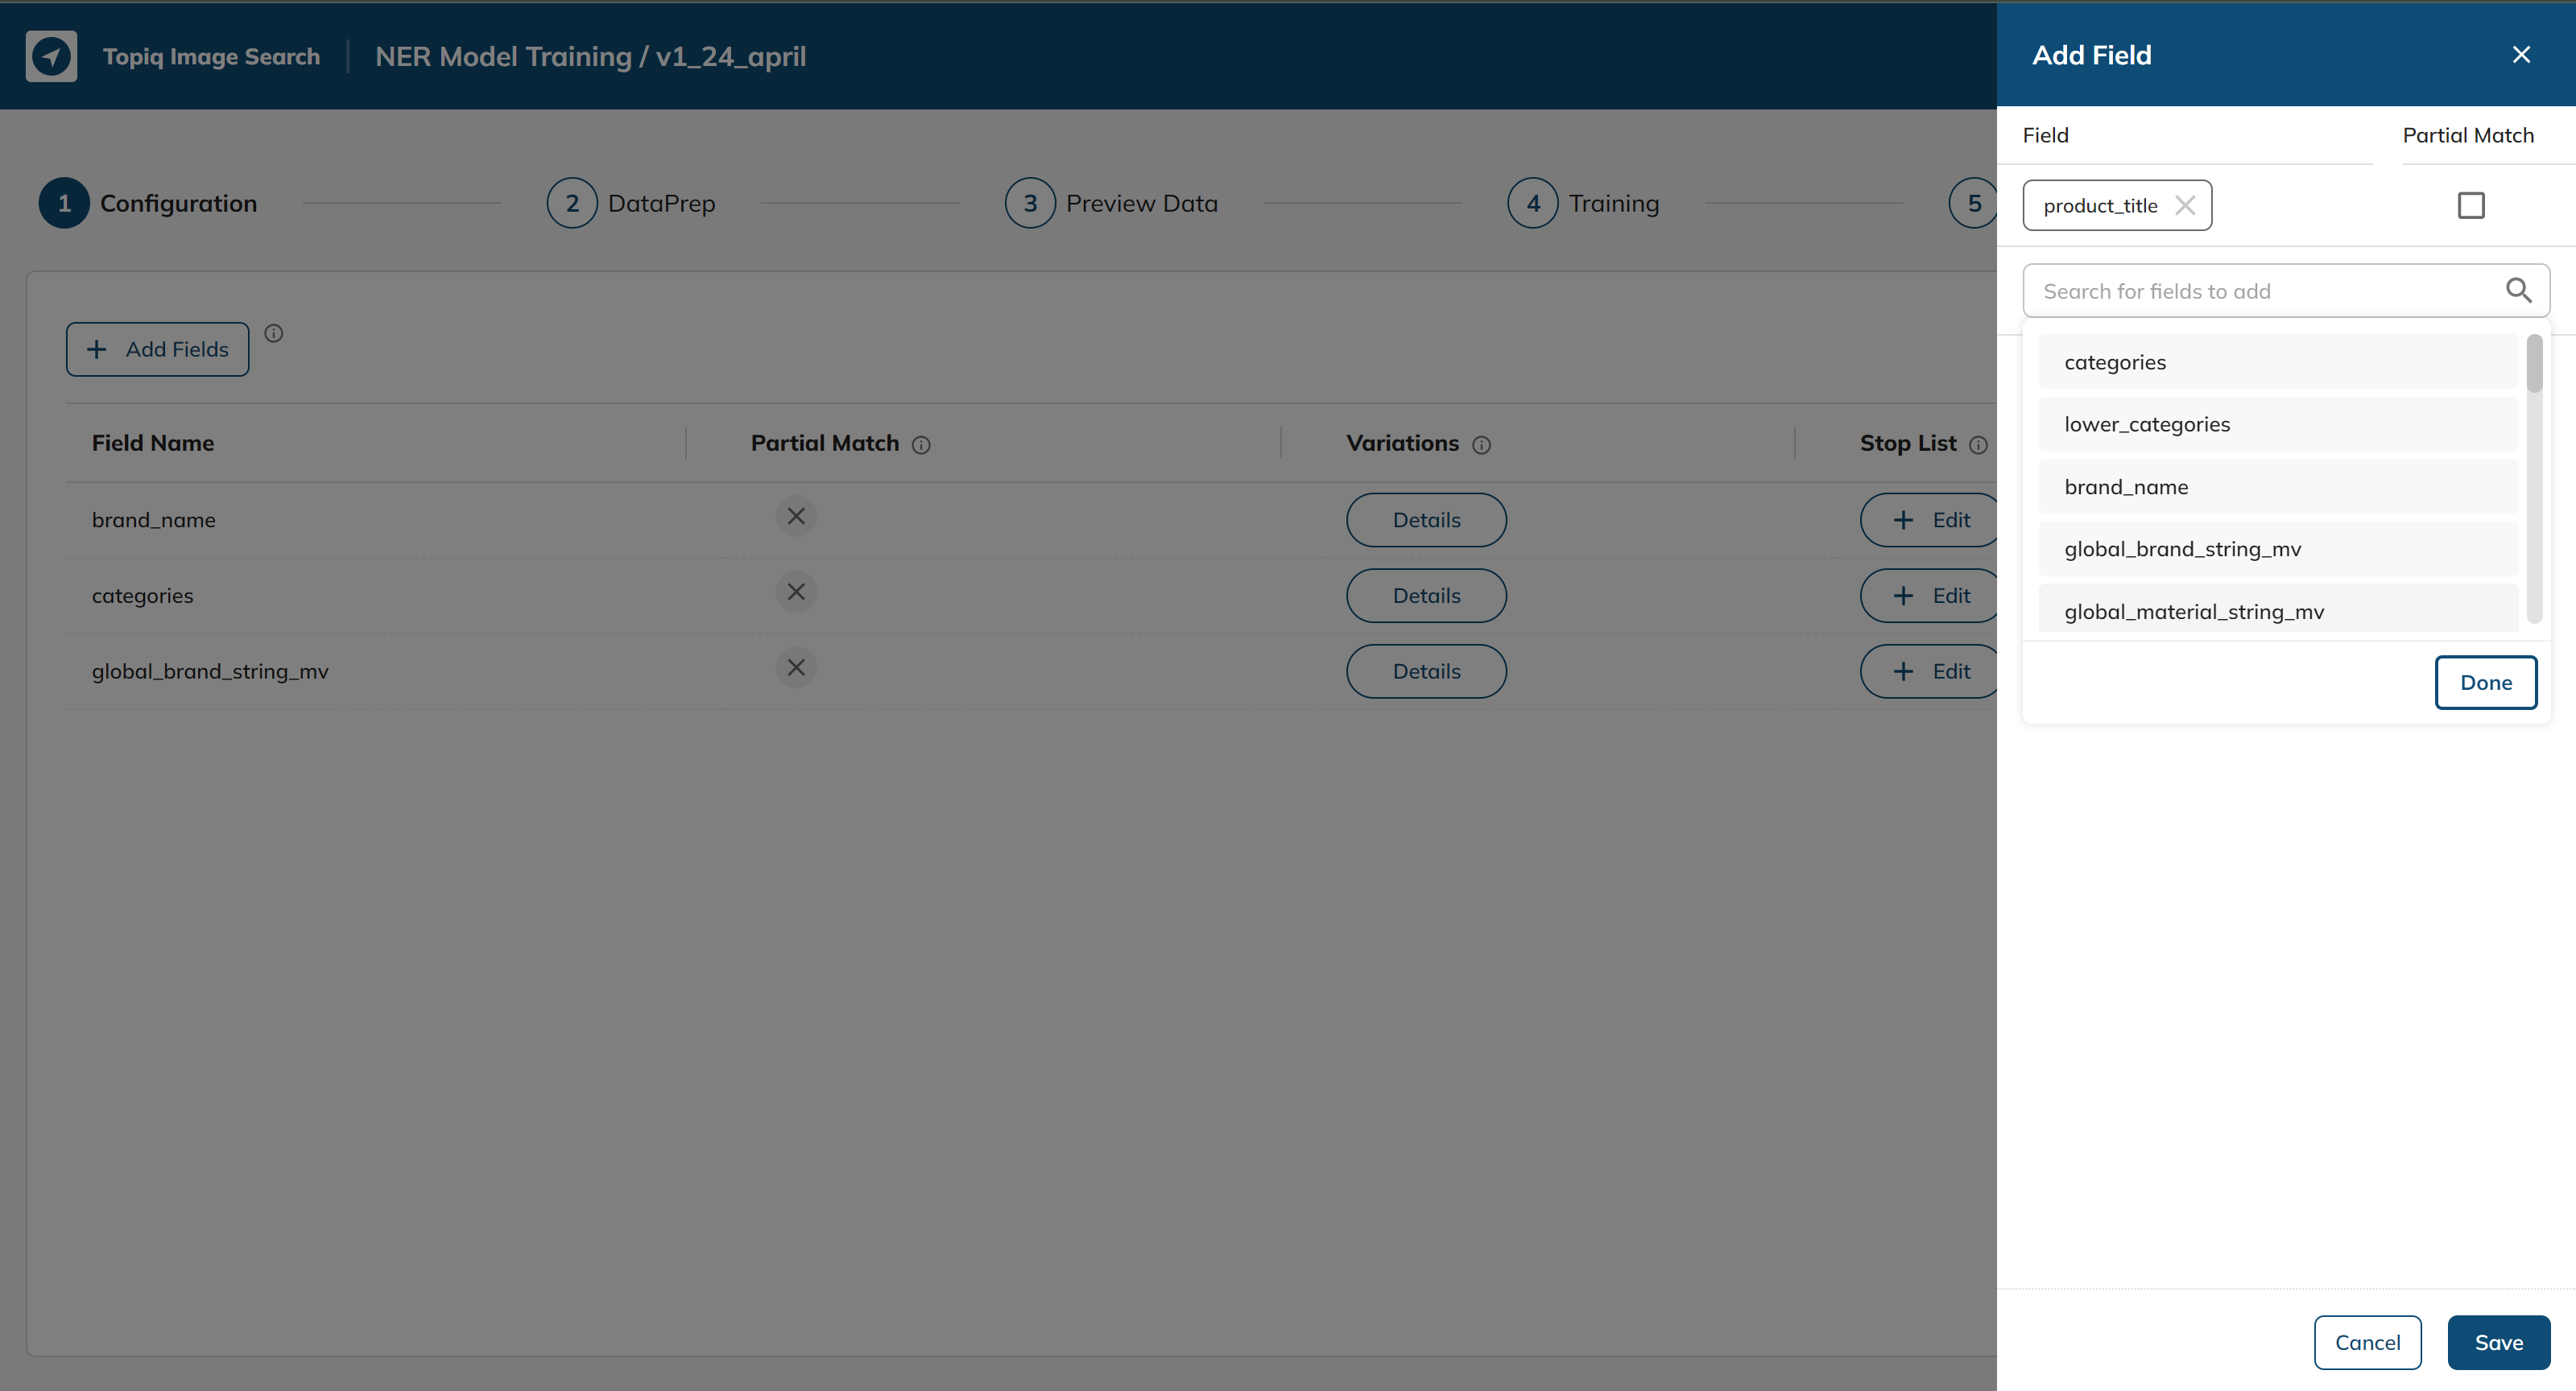
3: Click on partial match if required and then click save:
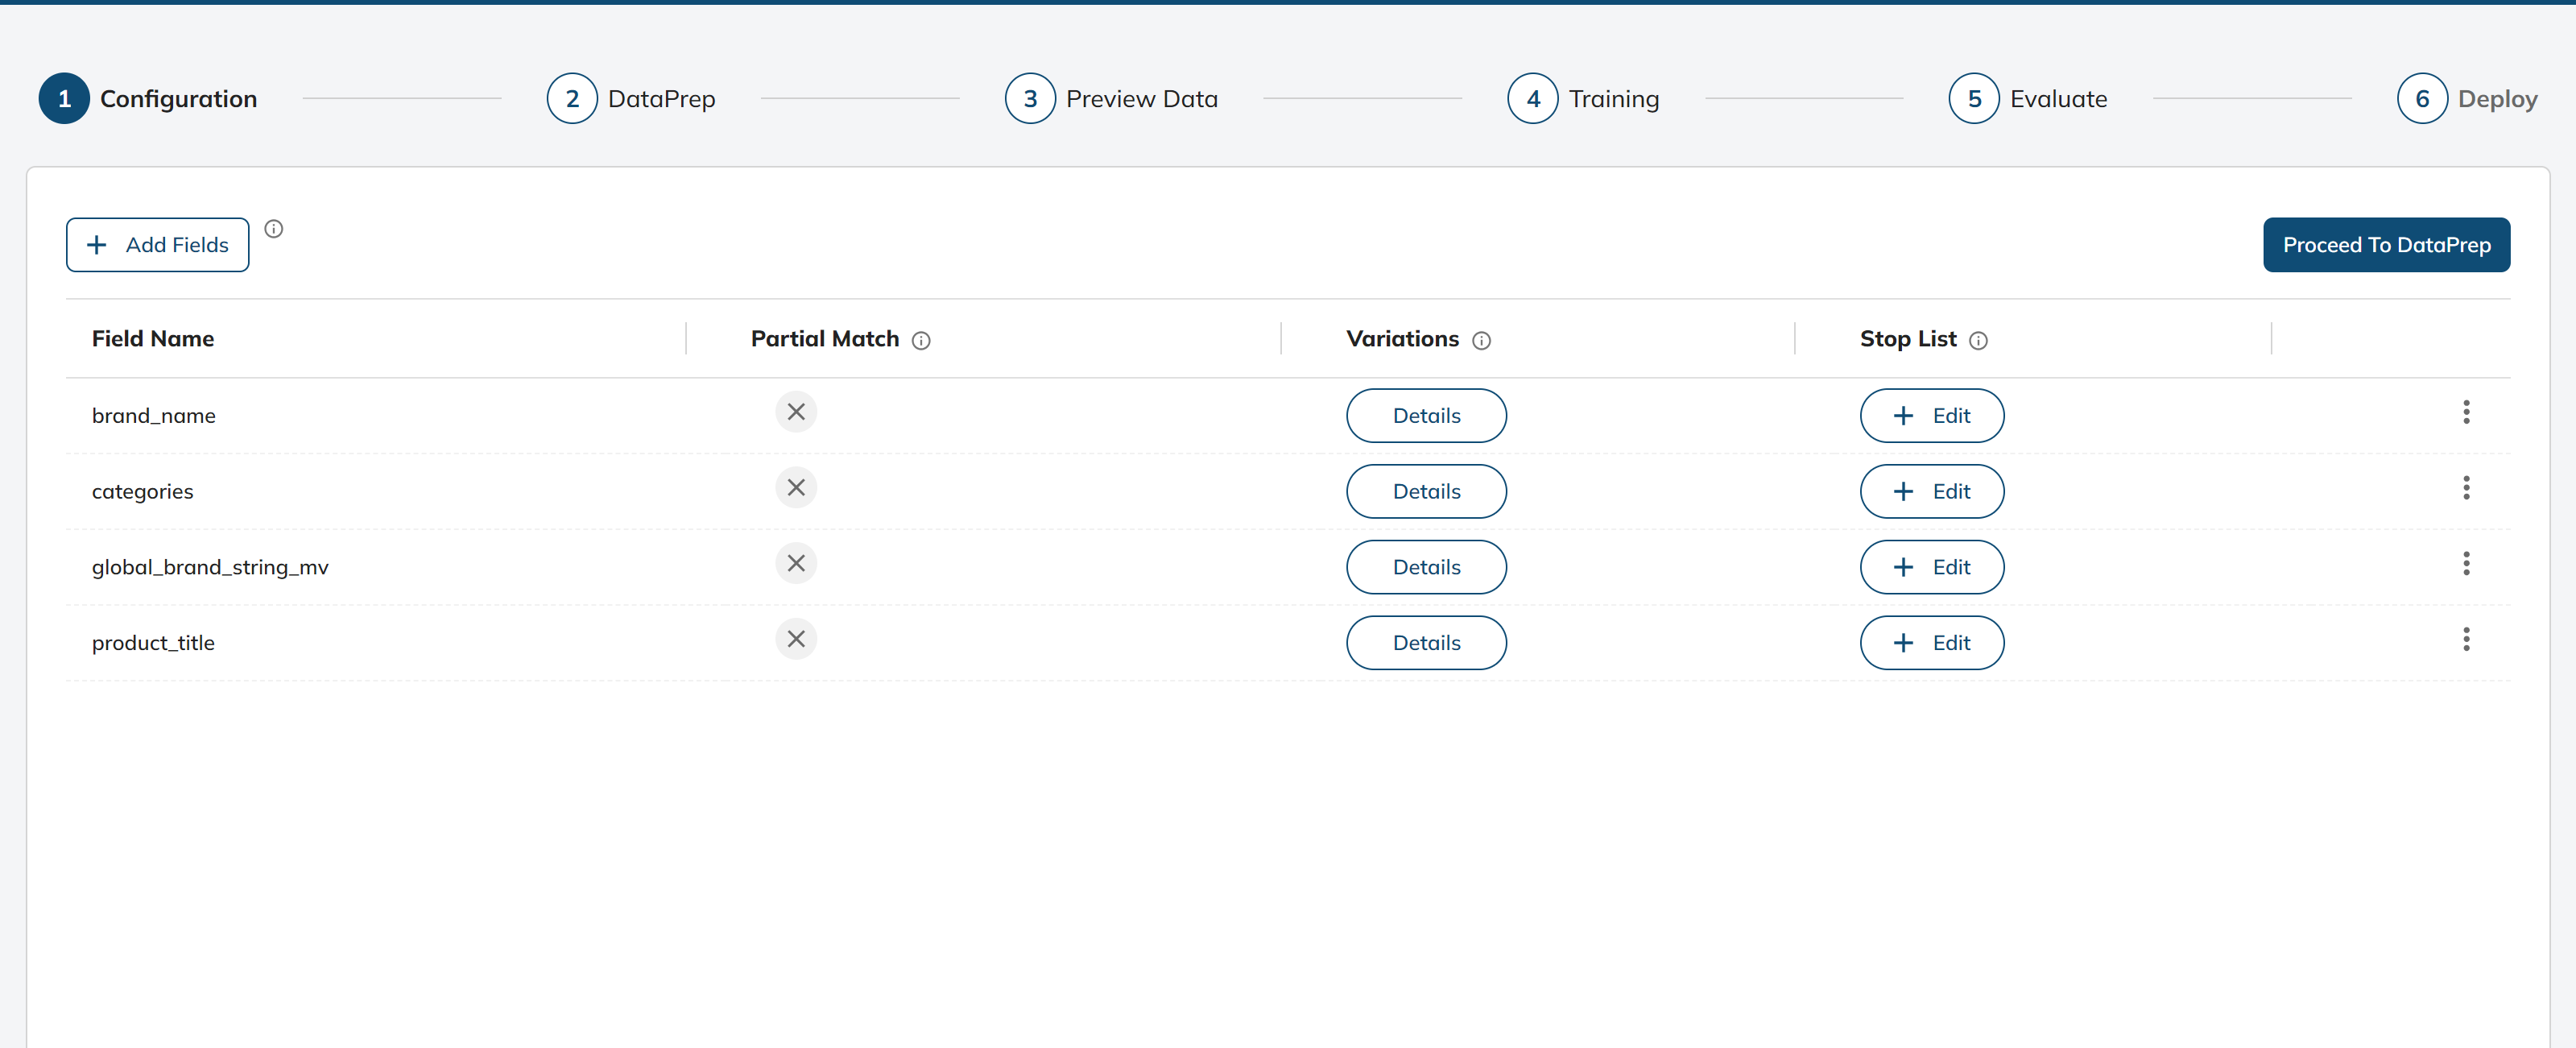
4: We have successfully added a configuration:
To add stop words, click the Edit button under the Stop List column for the Field Name you would like to add.
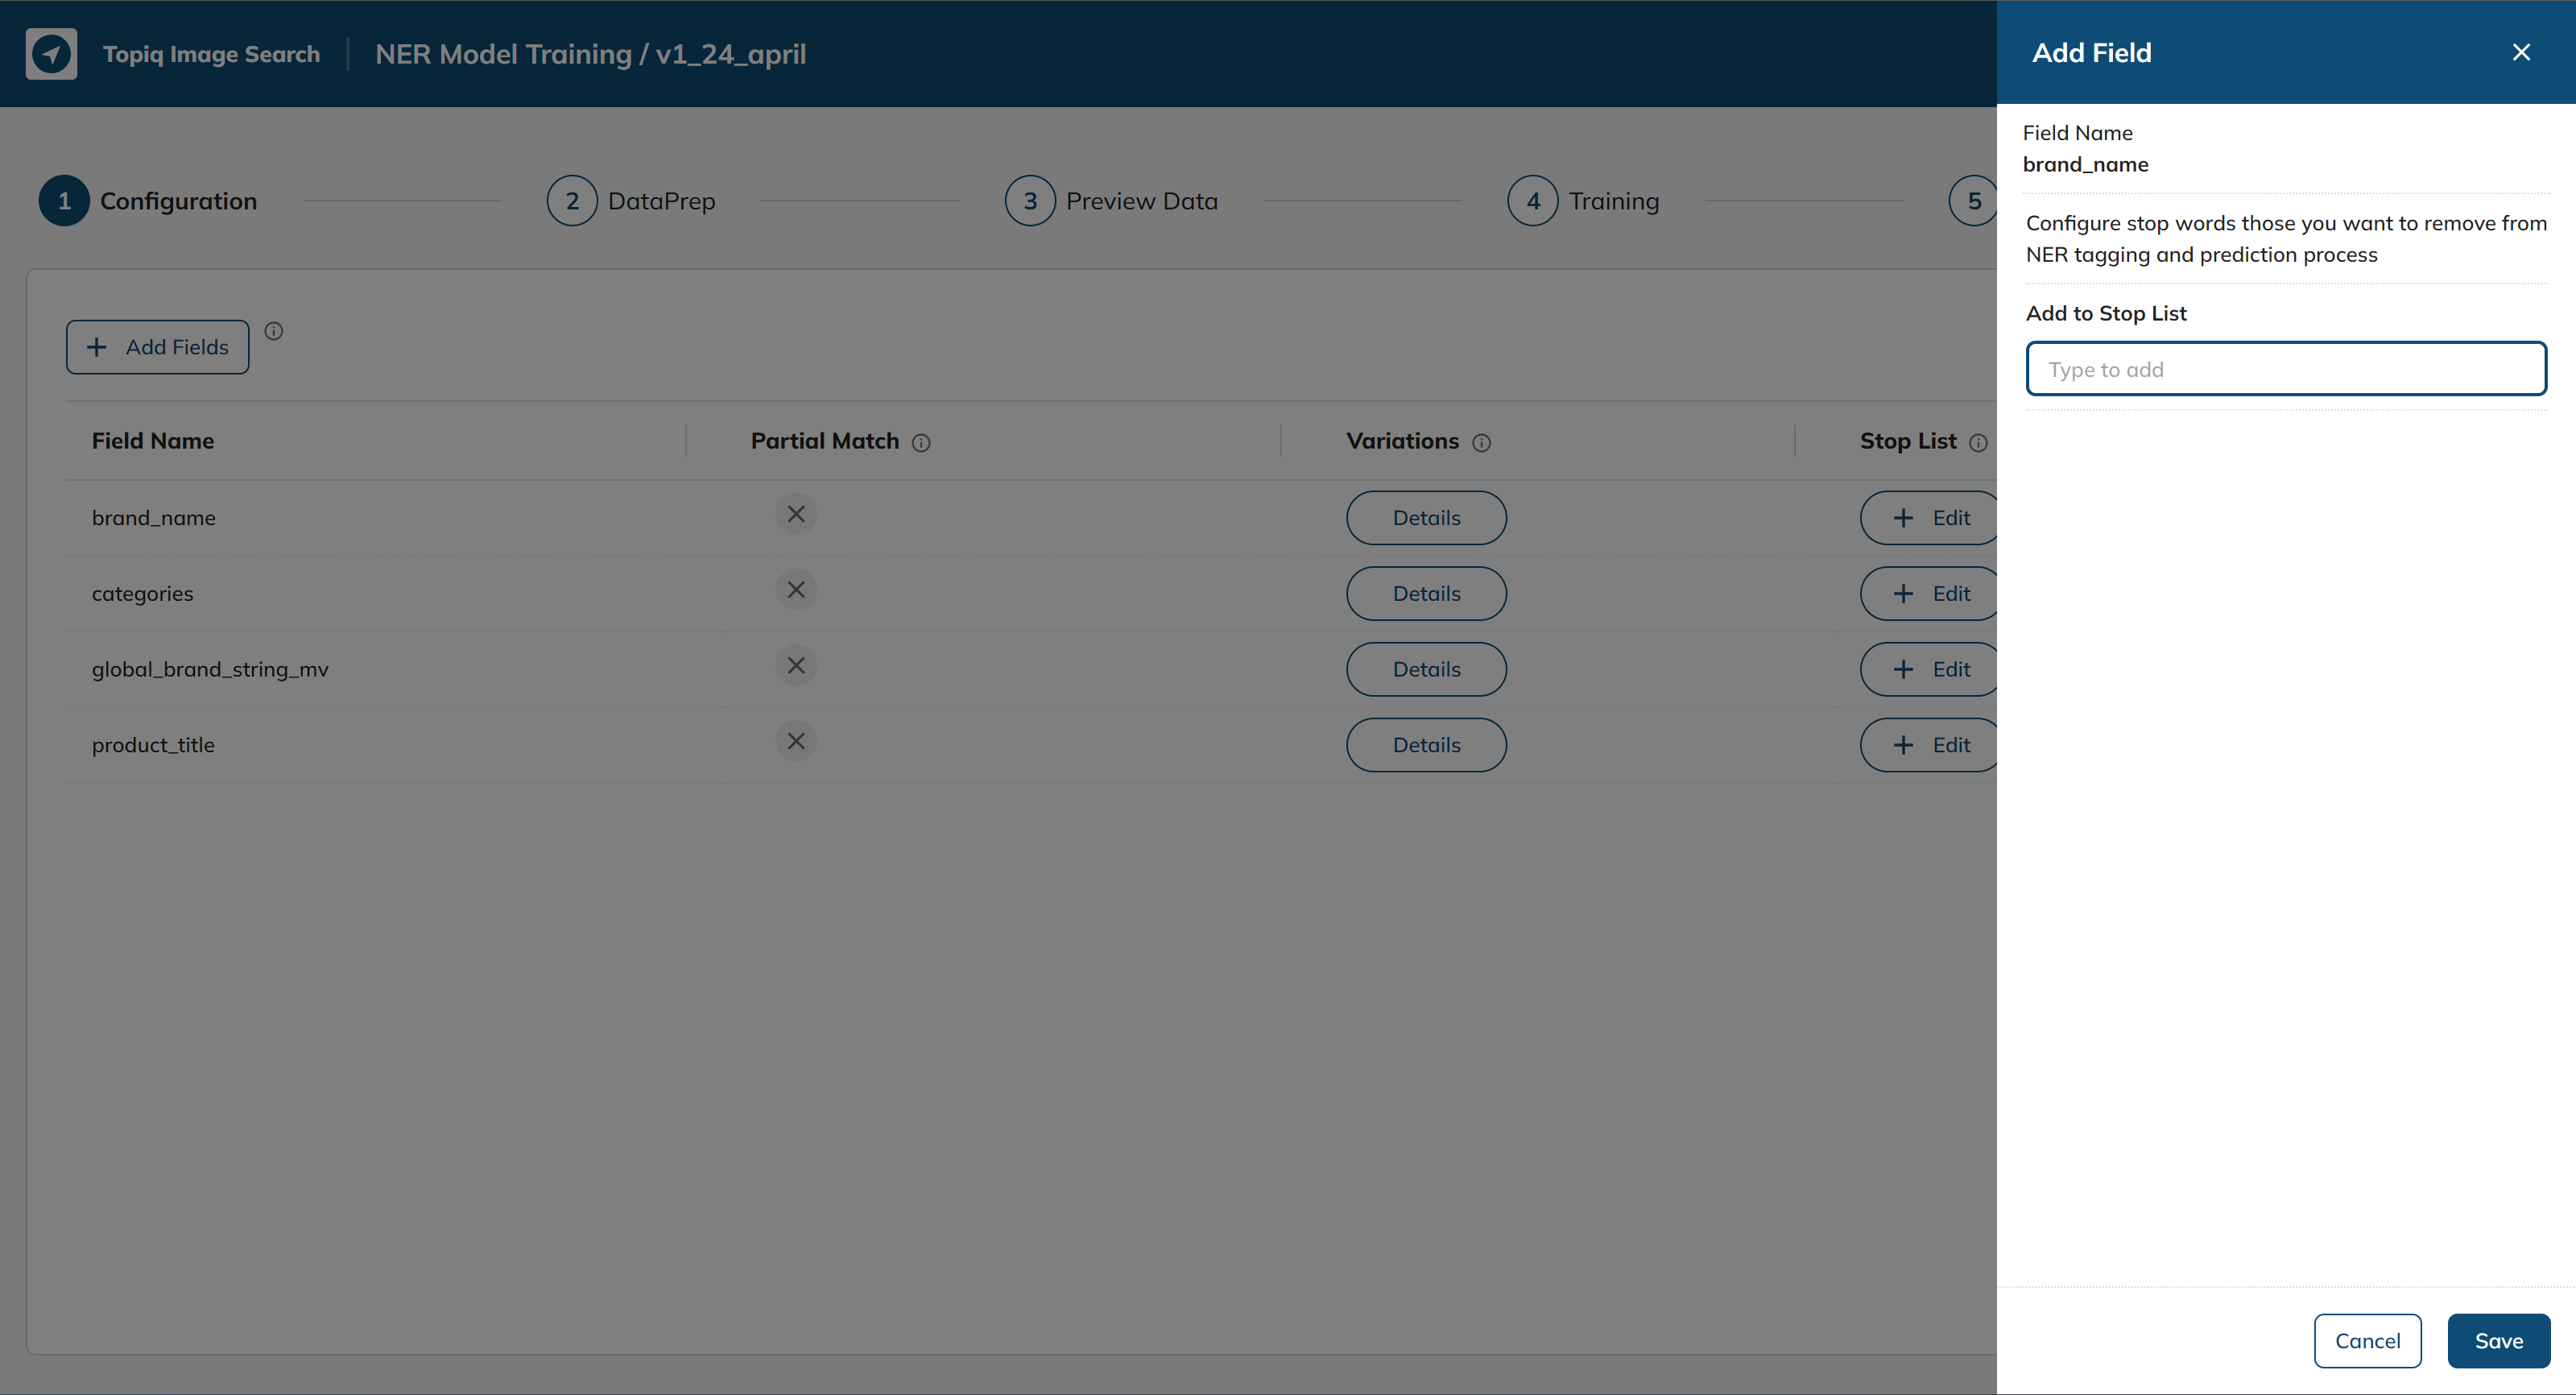
Add a stop word which you would like(we are adding test1234 to demonstrate):
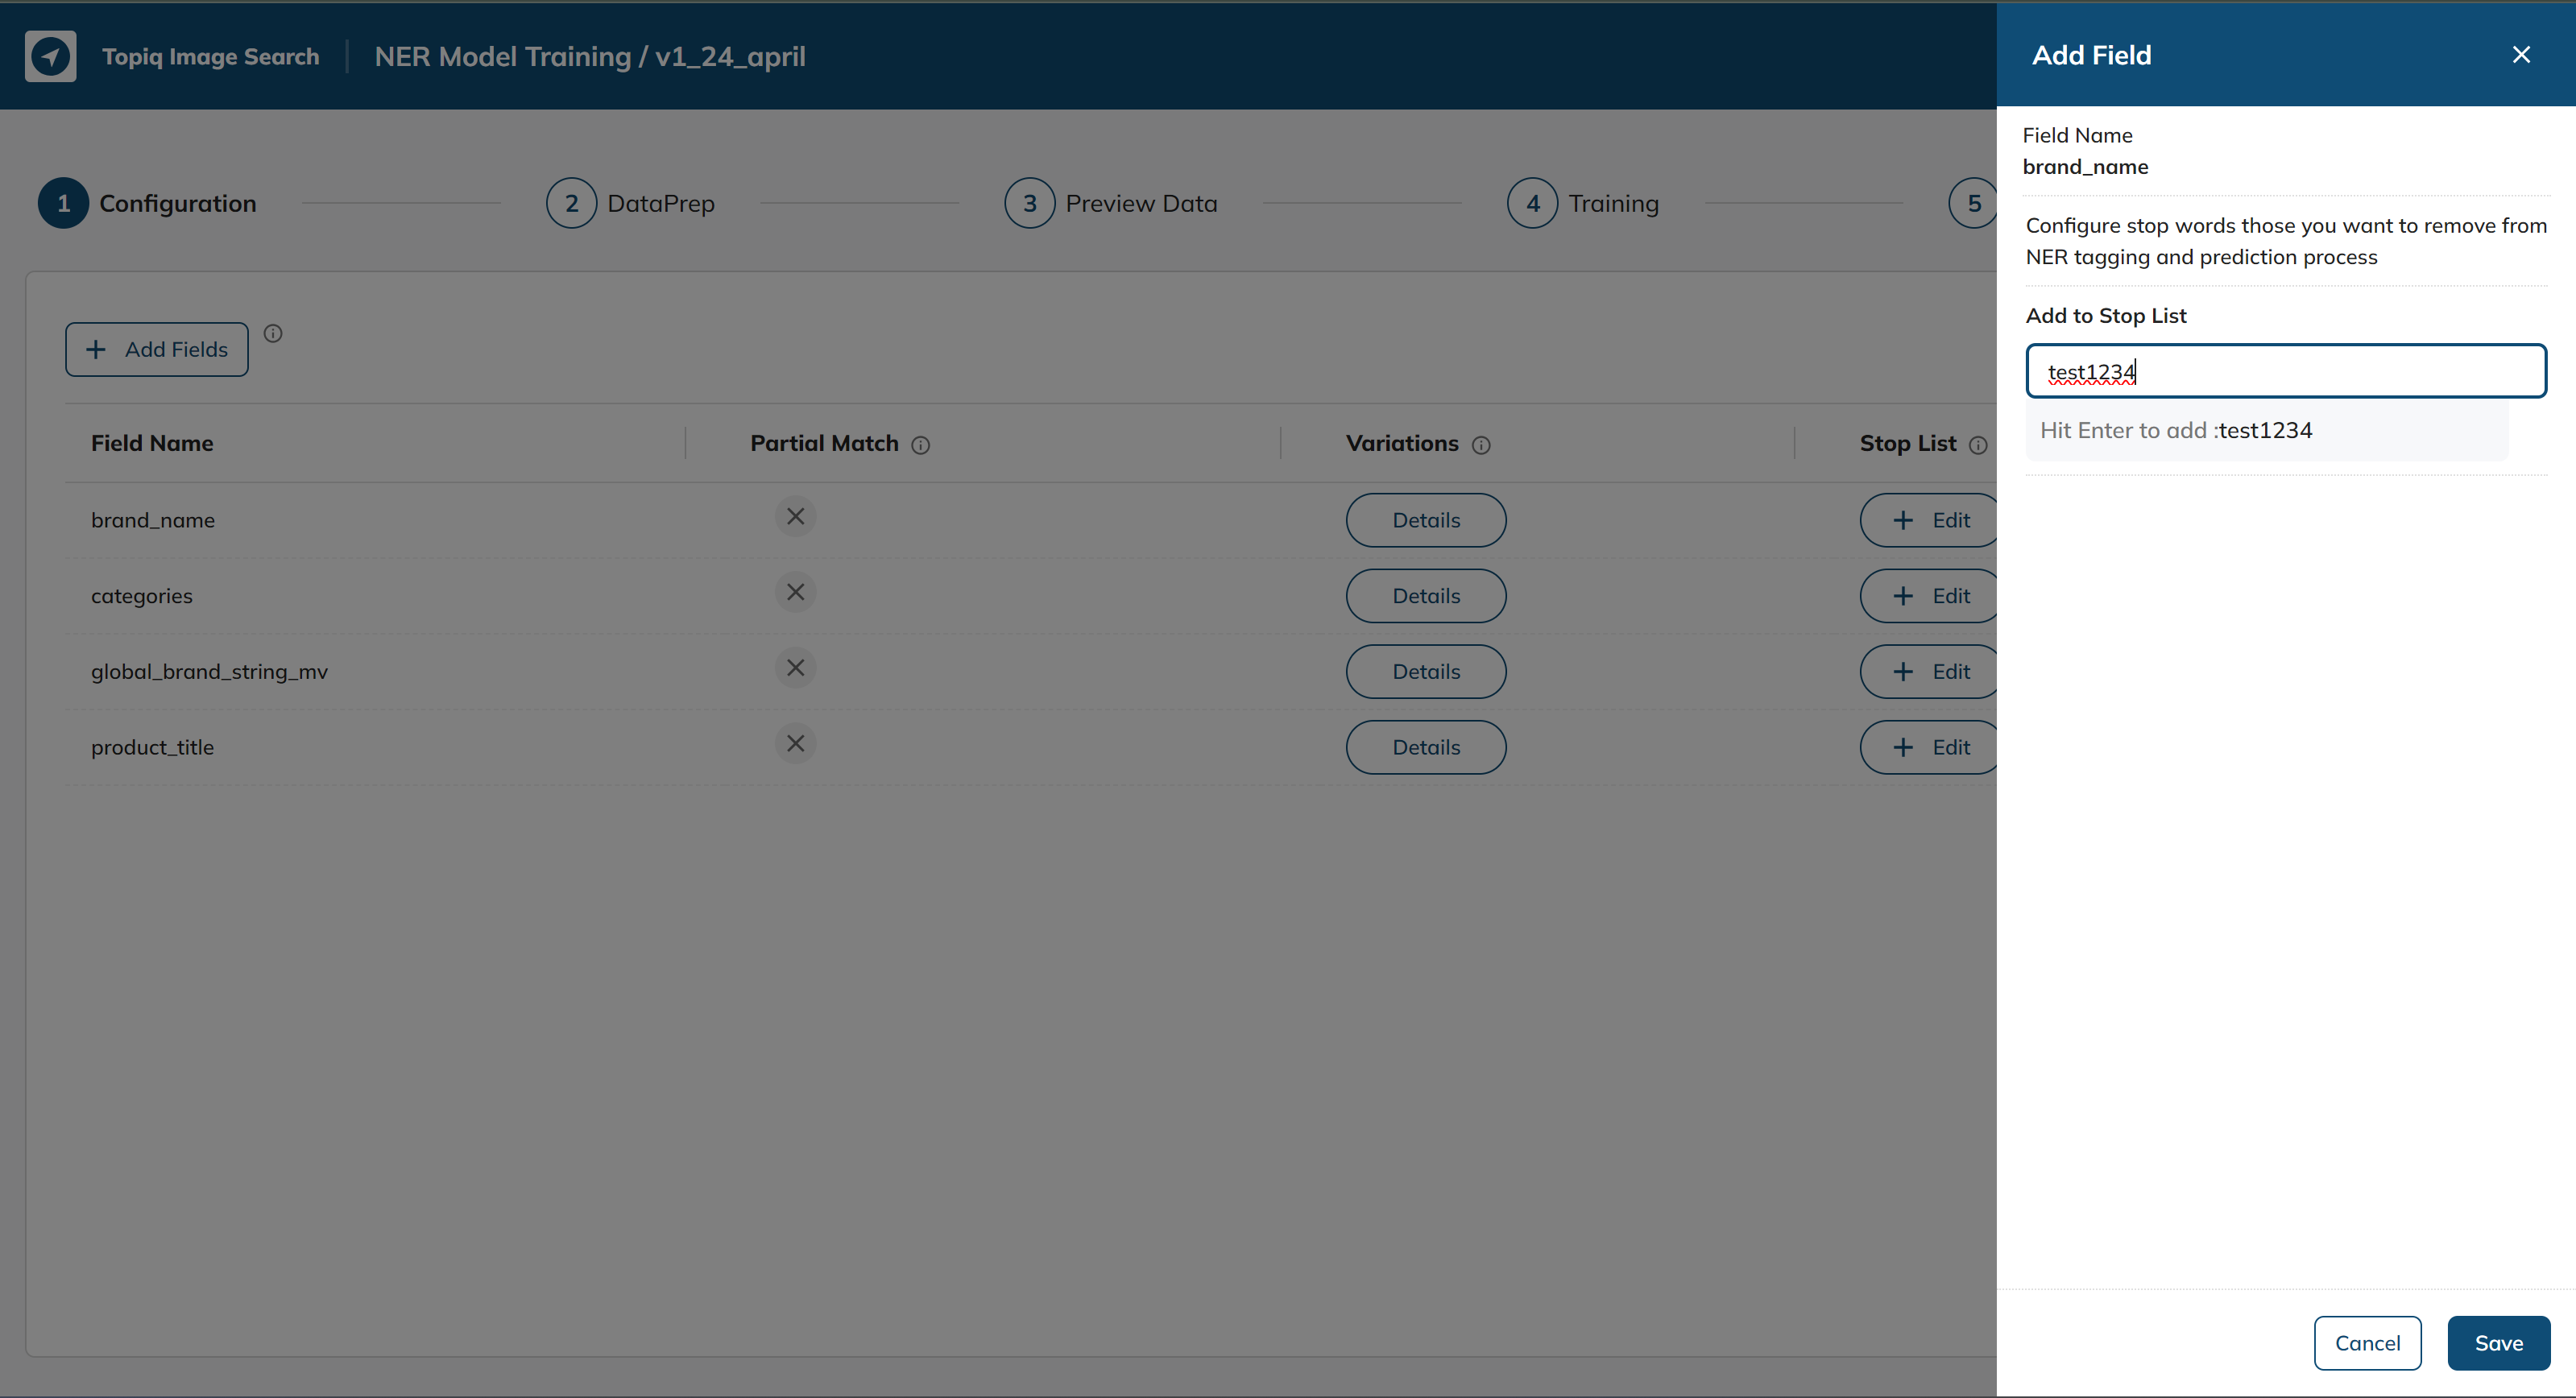
After clicking save stop word for that particular Field Name would be added.
We have now successfully configured the attributes.
Dataprep
Next, select a suitable dataset for the NER model training. After selecting the dataset, run data prep to clean and preprocess the data.
Data Preview
Once the dataset is pre-processed, perform a data preview to obtain some useful insights into the dataset. The following details can be analyzed during the data preview:
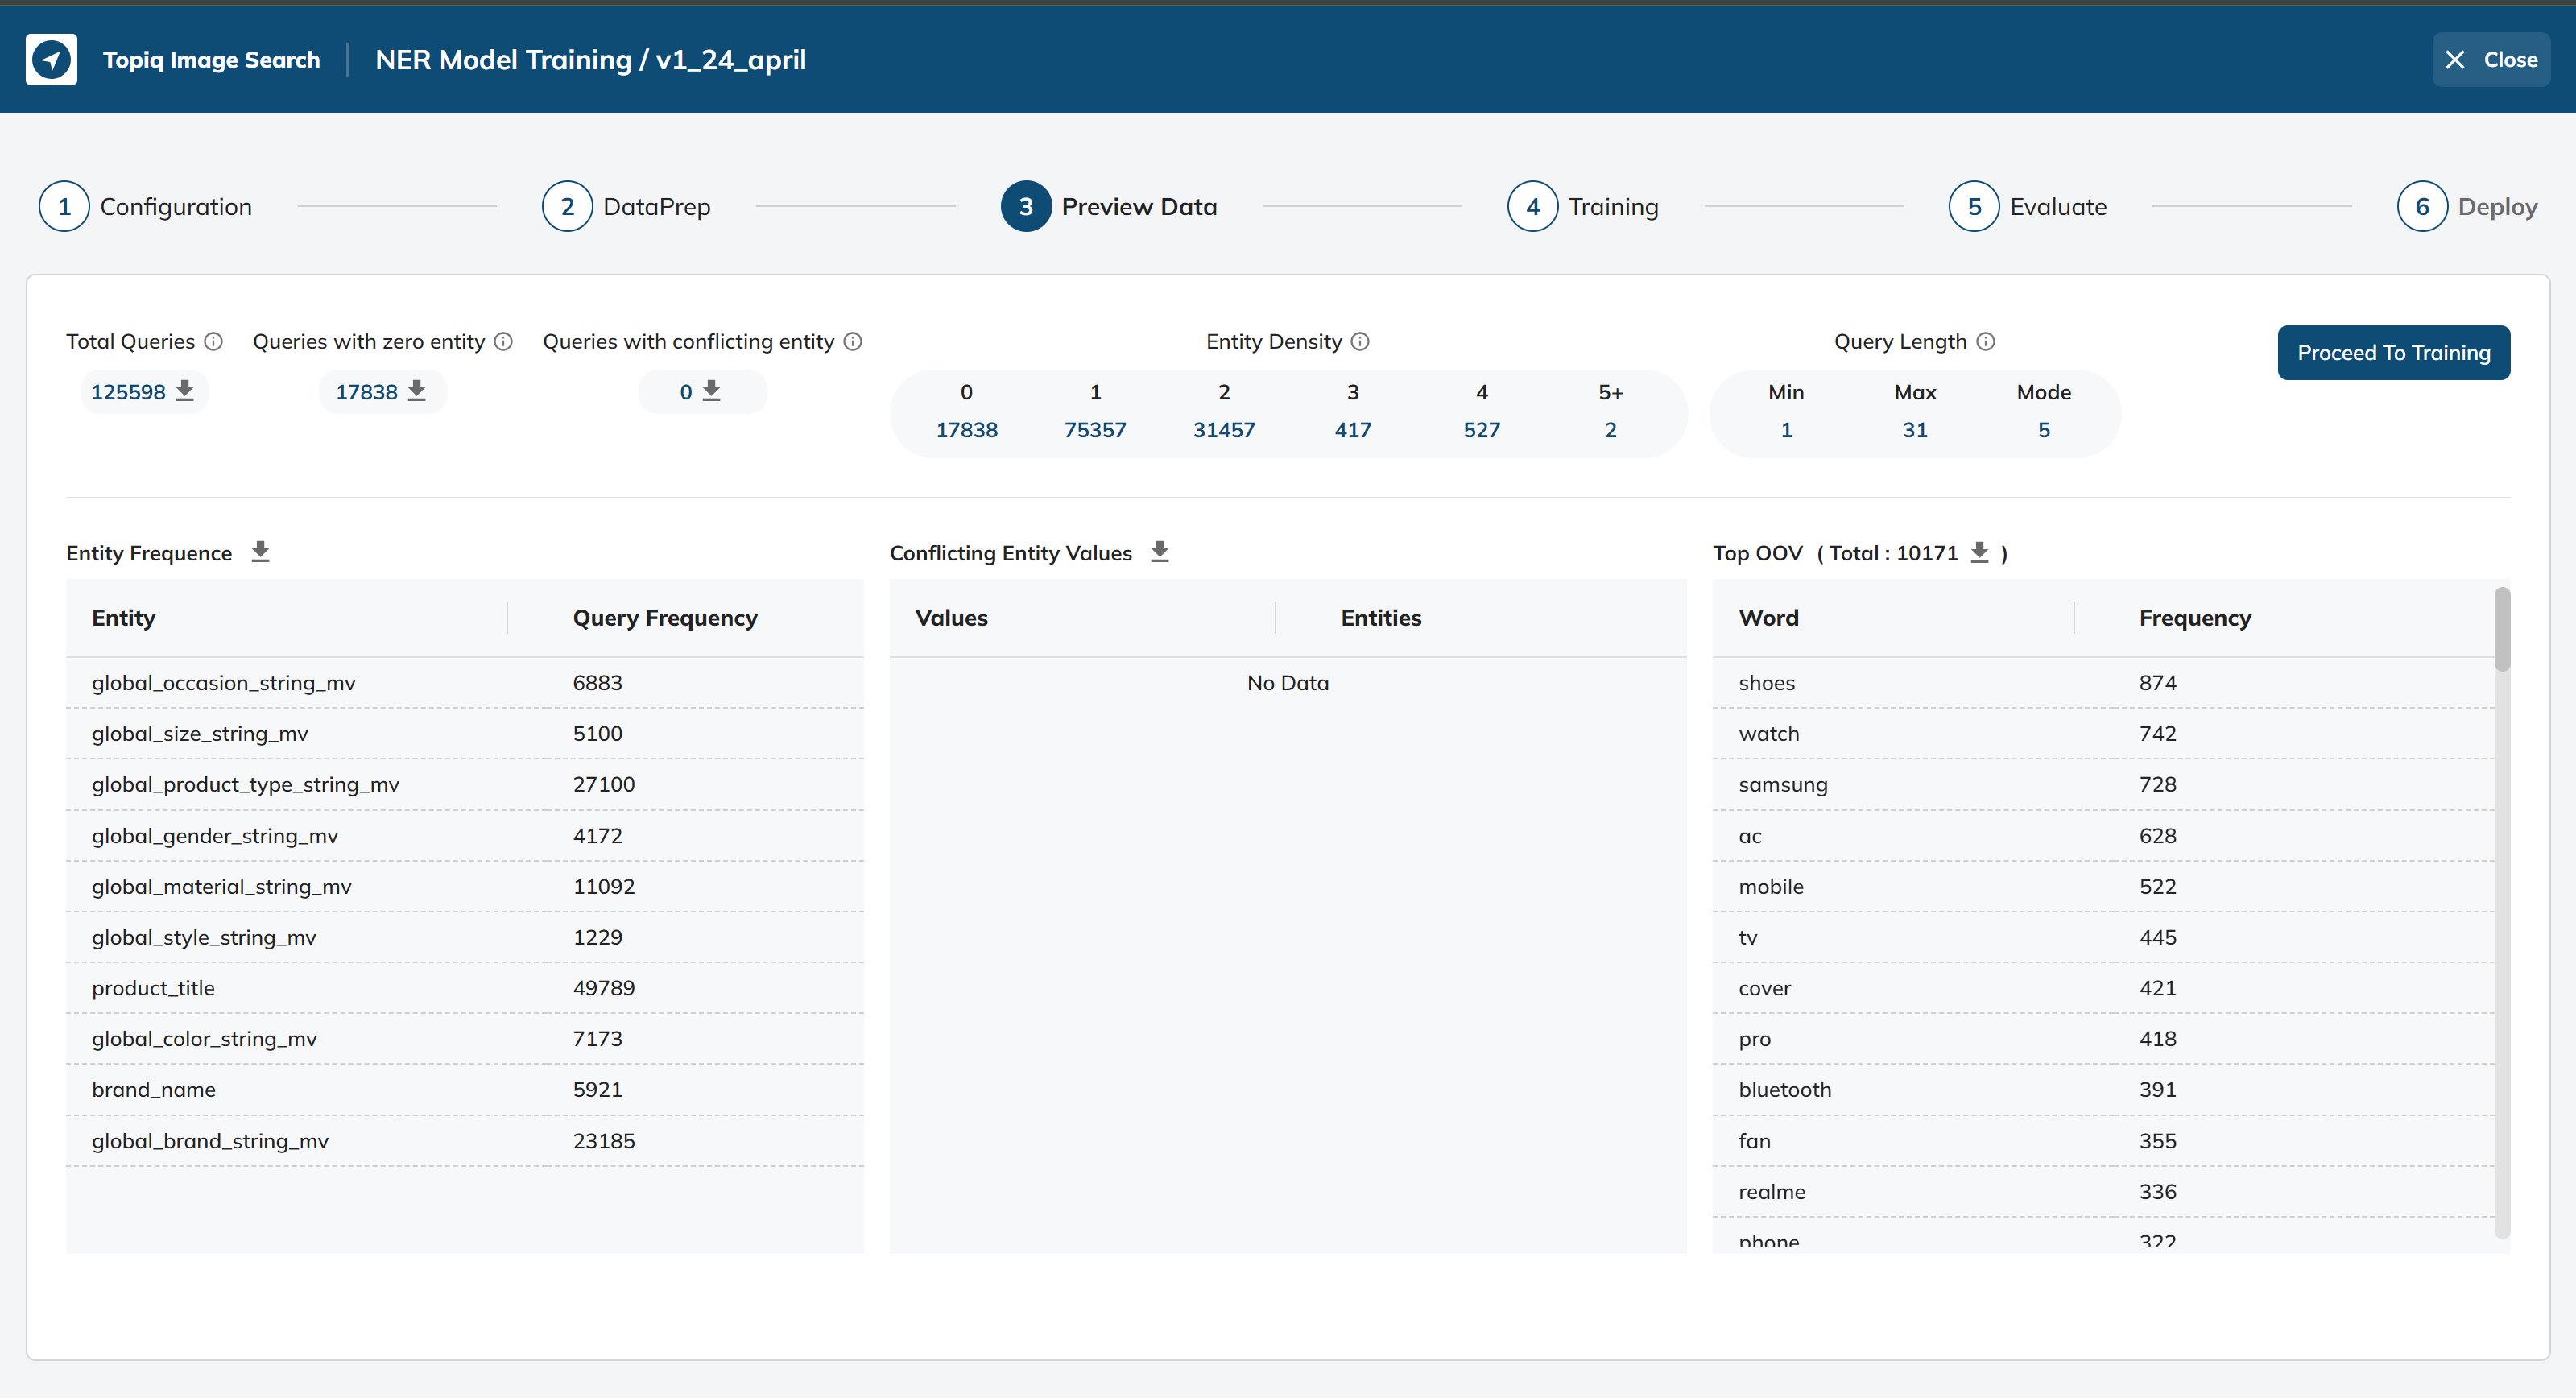
Query Frequency: The number of unique queries in the dataset. (single number)
Entity Frequency: The number of times an entity occurs in the dataset. (key-value pair)
OOV Density: The fraction of 'Out of Vocabulary' words in a sentence. (single number + popular words)
Entity Density: The number of entities in a query with 1, 2, 3, 4, or 5+ entities. (key-value pair)
Conflicting Phrases: Phrases that are following under multiple Entities/Labels. (key-values pair)
Conflicting Phrases Queries: Queries with labels that have the phrase with multiple entities/labels (dropping from the output dataset). (table of query, words, labels)
Queries with zero entity: queries for which unable to tag any entity/labels. (table of query, words)
Train Model:
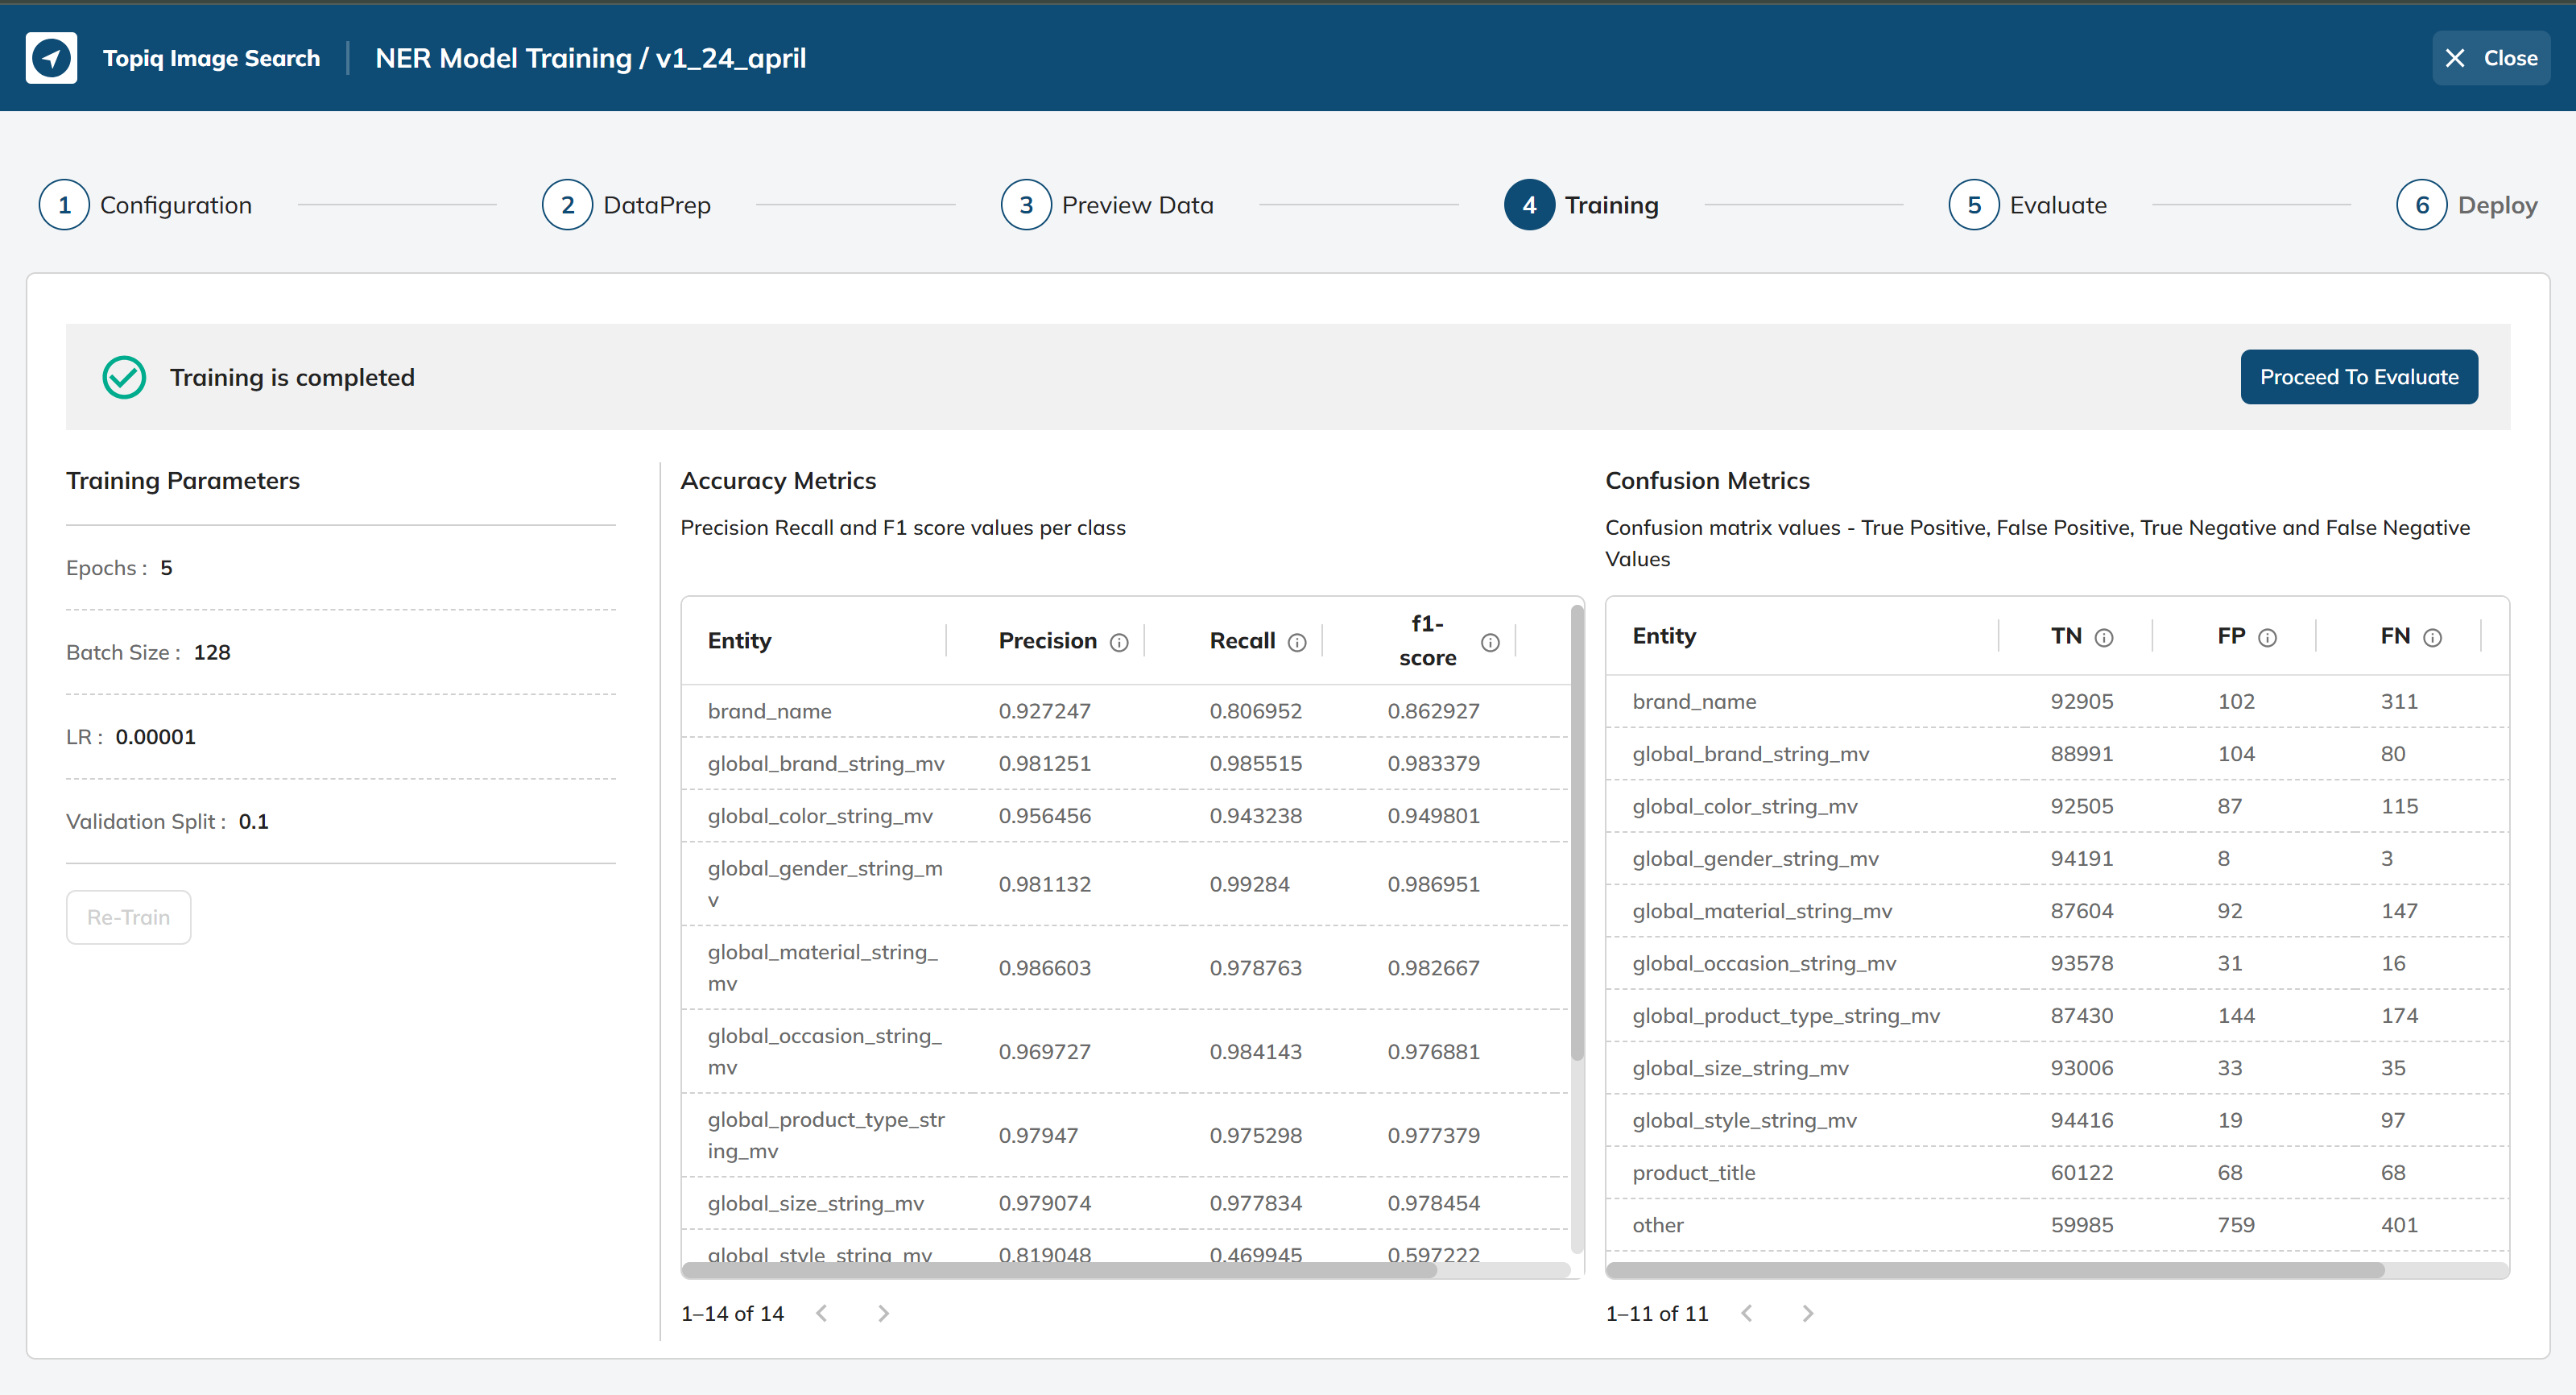
After analyzing the data, configure the training parameters and start training the NER model.
The following are the training parameters that can be adjusted during model training:
Epochs: The number of times the model should be trained on the entire dataset. The default value is 5, and the minimum and maximum values are 1 and 30, respectively.
Batch Size: The number of samples processed by the model at each training iteration. The default value is 64, and the minimum and maximum values are 8 and 128, respectively.
LR (Learning Rate): The rate at which the model adjusts its parameters during training. The default value is 0.00001, and the minimum and maximum values are 0.0000001 and 0.01, respectively.
Validation Split: The fraction of the dataset used for validation during training. The default value is 0.1, and the minimum and maximum values are 0.1 and 0.3, respectively.
After successful train, you will have model accuracy to see how well your model performed on train data.
Validate/Test Model:
Once the model is trained, it's important to validate and test it to check its accuracy and performance. This can be done by using a suitable evaluation metric, such as F1 score, precision, and recall. The following are the steps involved in validating and testing the NER model:
Select Test Dataset or Upload New Test Dataset: Here, we can select a suitable test dataset or upload a new test dataset to evaluate the model's performance.
Run the Model to Generate Reports: Once the test dataset is selected, run the NER model on the test dataset to generate the required reports. These reports could include a confusion matrix, precision-recall curve, and F1 score.
Review the Performance of the Model: After generating the reports, review the performance of the NER model based on the generated reports. Evaluate the model's accuracy, precision, and recall for each entity type. Additionally, analyze the false positive and false negative rates to identify areas of improvement for the model.
Prediction Report: Model prediction report with filters like, where the model fails to predict the expected result, filter by labels, etc. (table of search_term/query, expected labels, predicted labels)
It's important to note that the performance of the NER model should be evaluated on a test dataset that is different from the training dataset. This ensures that the model is generalized and can accurately identify entities in new data. Furthermore, it's recommended to evaluate the NER model on multiple test datasets to ensure its robustness and effectiveness.
Deploy Model:
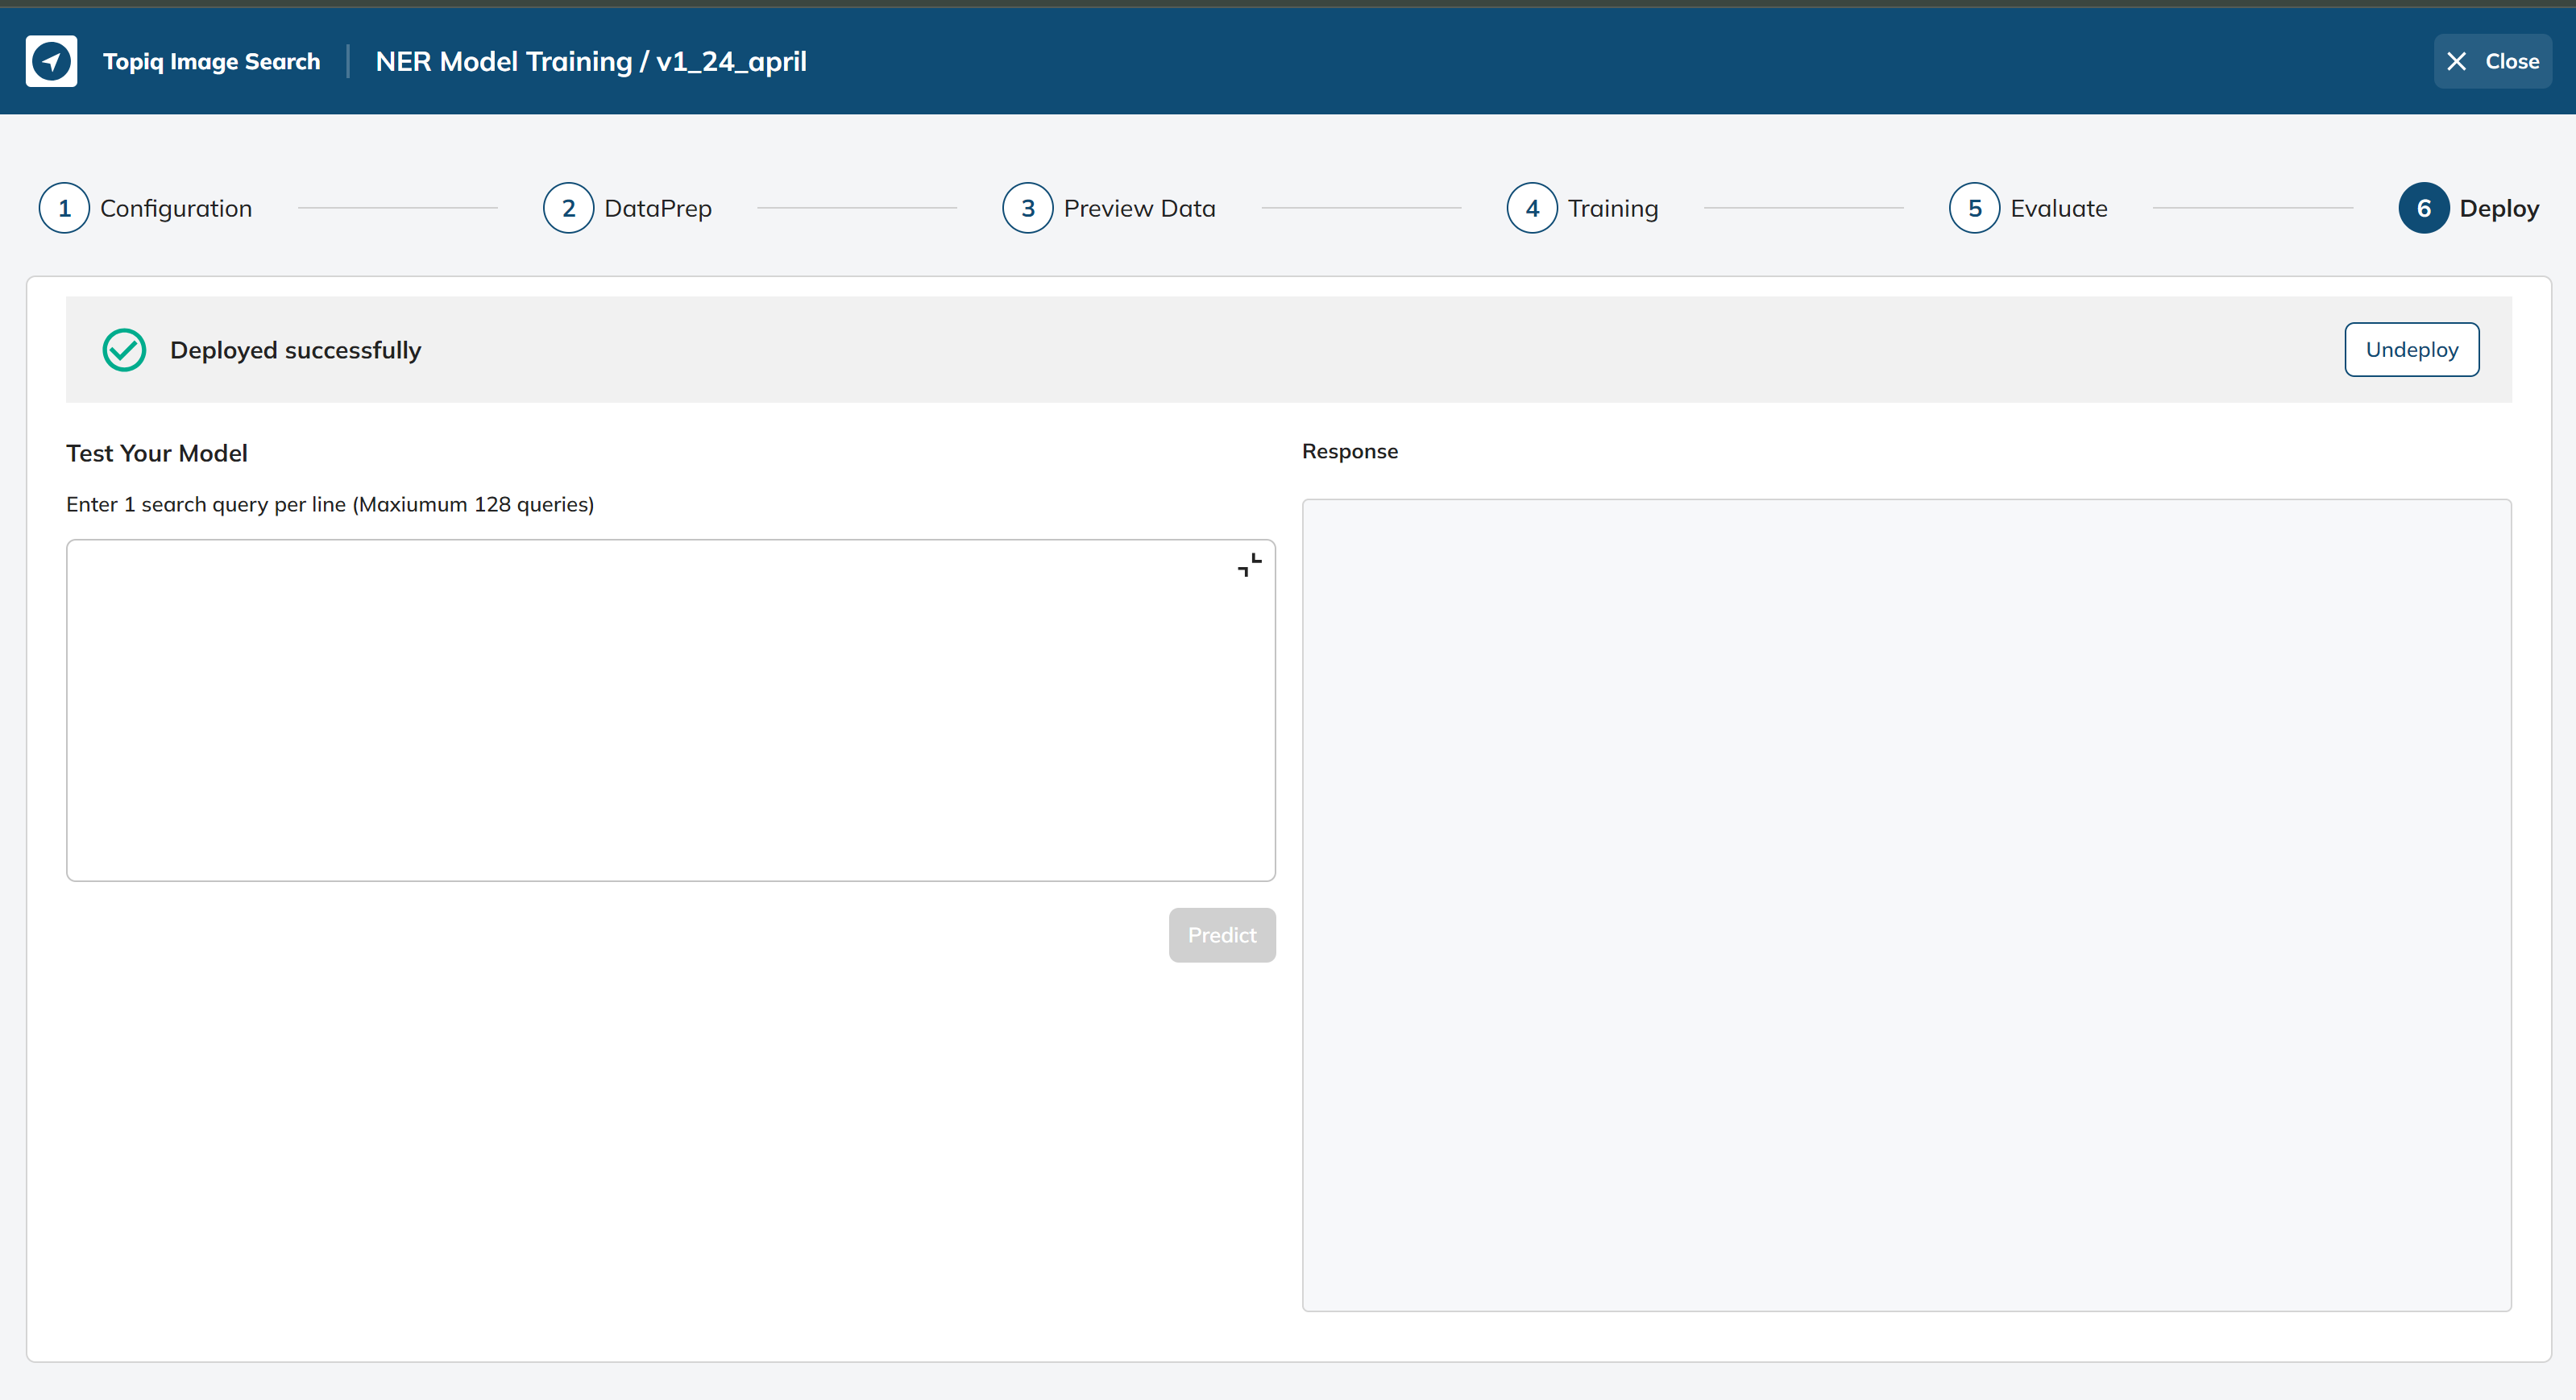
After the NER model has been trained and validated, it can be deployed to the inference service.
And you can test the output of your model by entering query on white box on the left, result will be coming on right side.
Updated over 1 year ago