Personalization Section
Overview
The Personalization section is a powerful tool designed to help you understand and segment your audience effectively, allowing for more targeted marketing strategies and personalised user experiences.
Subsections:
- Overview: Get high-level insights into your audience and personalization efforts.
- Audience: Dive into detailed user-level data such as cart adds, purchases, and wish lists.
- Segments: Categorise users based on common attributes for refined targeting.
Overview:
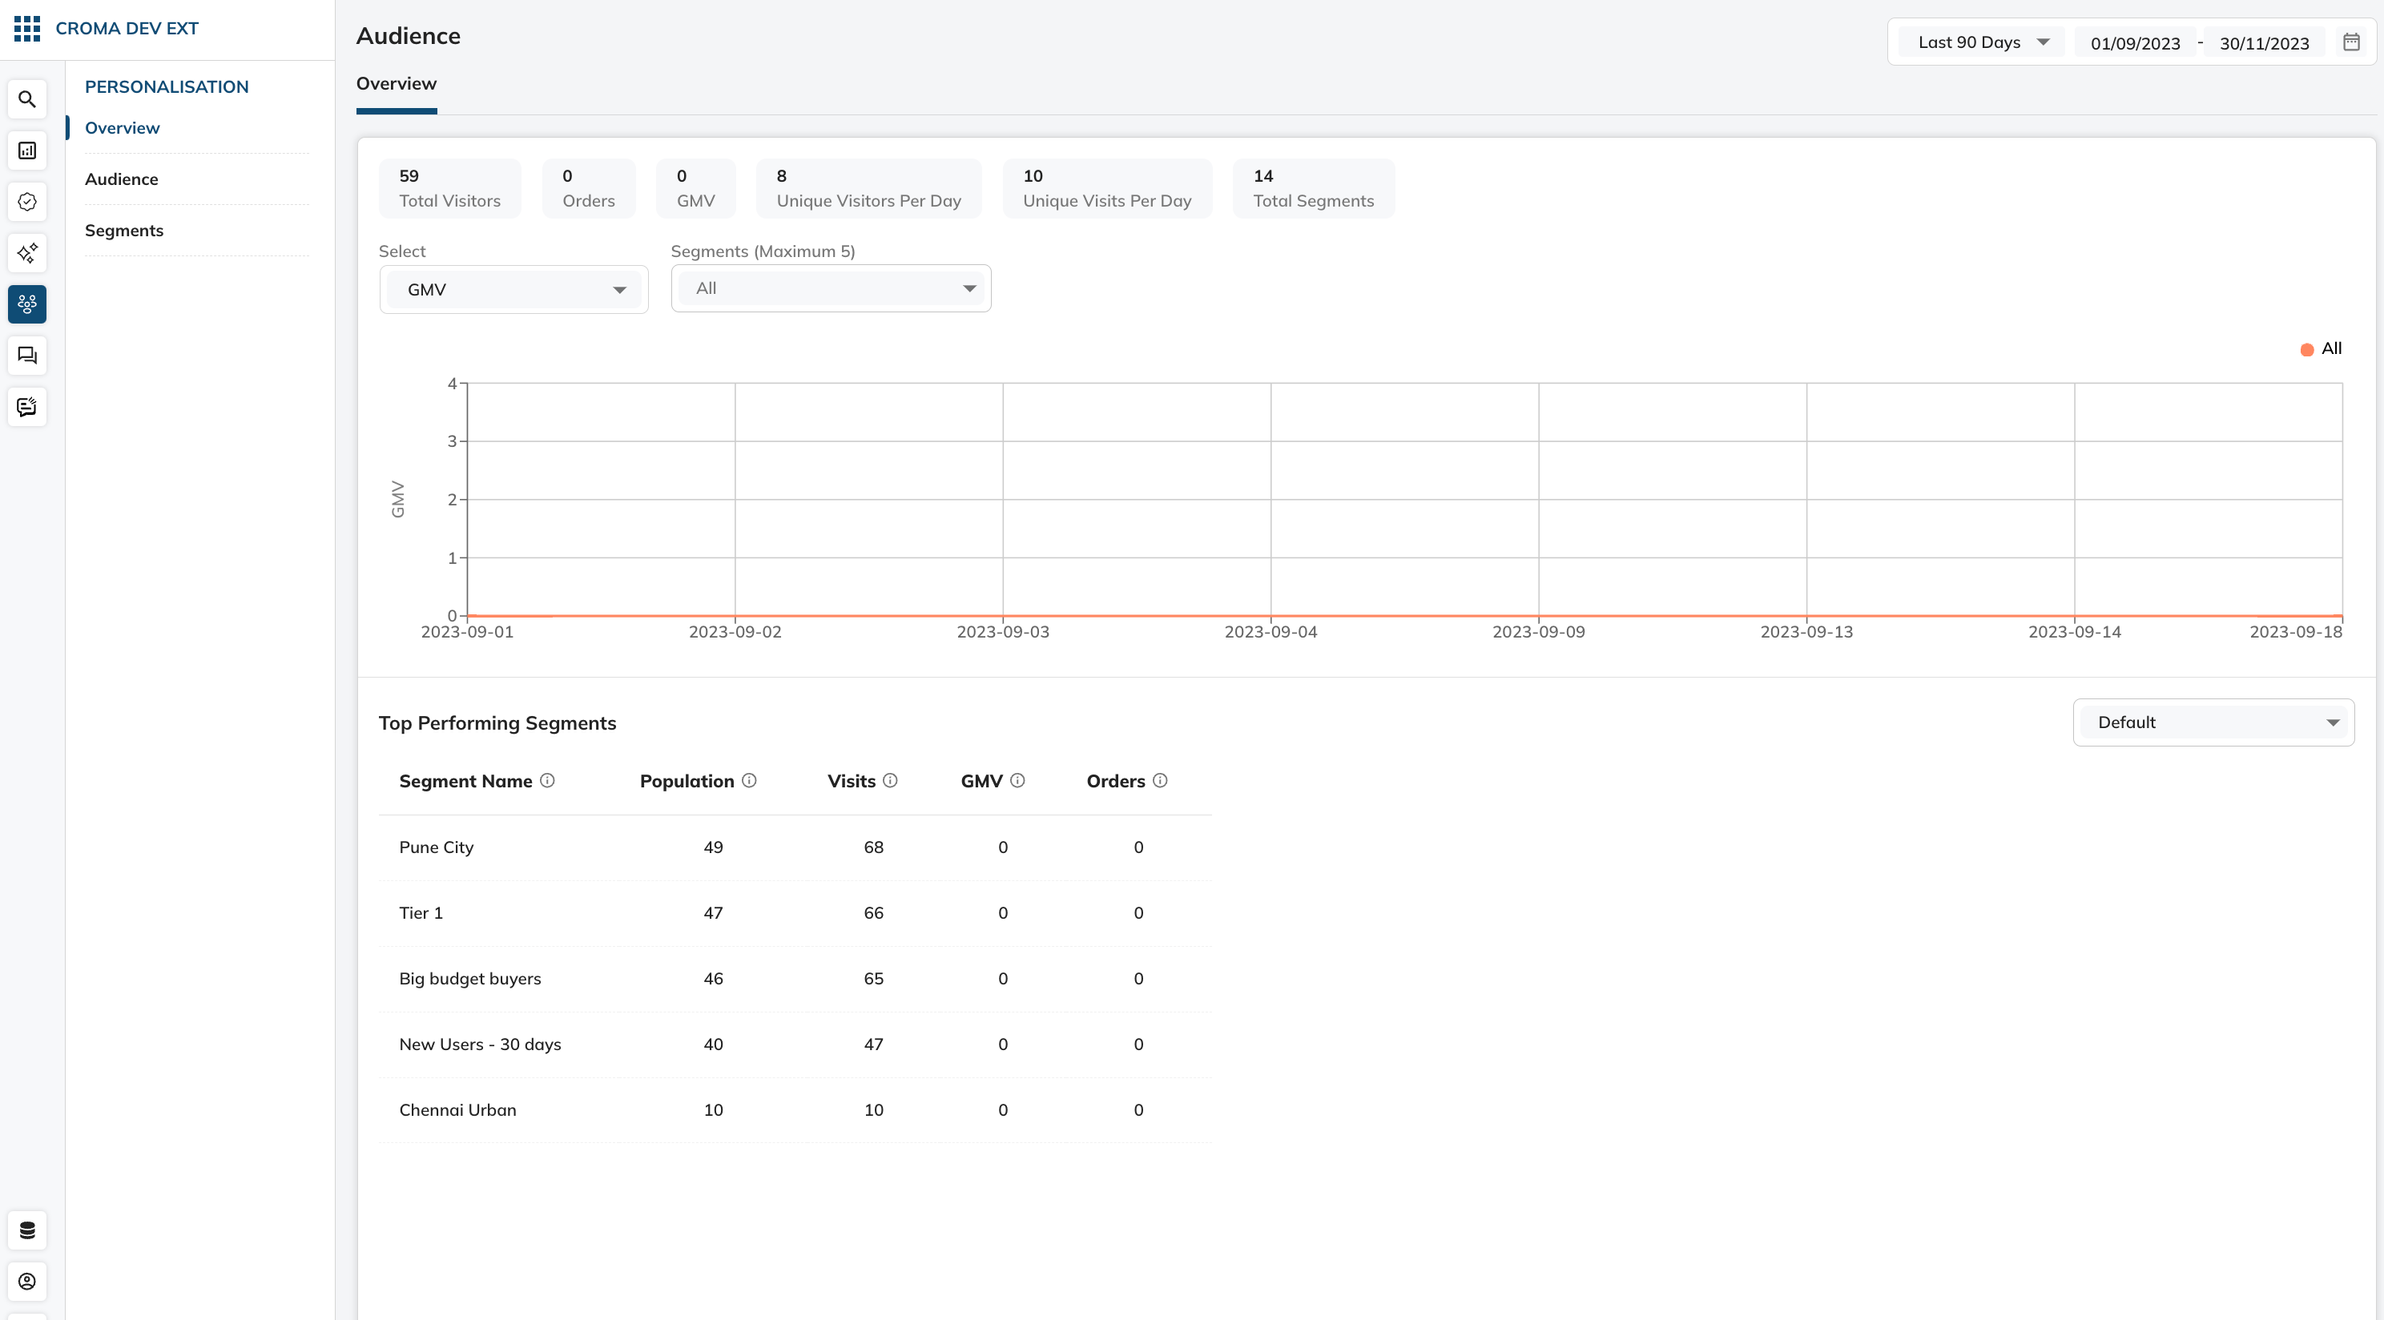
Access a dashboard summary of your personalization strategy performance, including metrics like Total Visitors, Orders, GMV (Gross Merchandise Value), and more.
Steps:
- Navigate to the ‘Overview’ tab on the left-hand menu to access the dashboard.
- View key metrics at a glance for a selected time range.
- Utilize the dropdown menus to filter results by specific attributes like GMV.
- Analyze the performance over time through the graph displayed.
- Scroll down to see ‘Top Performing Segments’ with data on population, visits, GMV and orders.
Audience
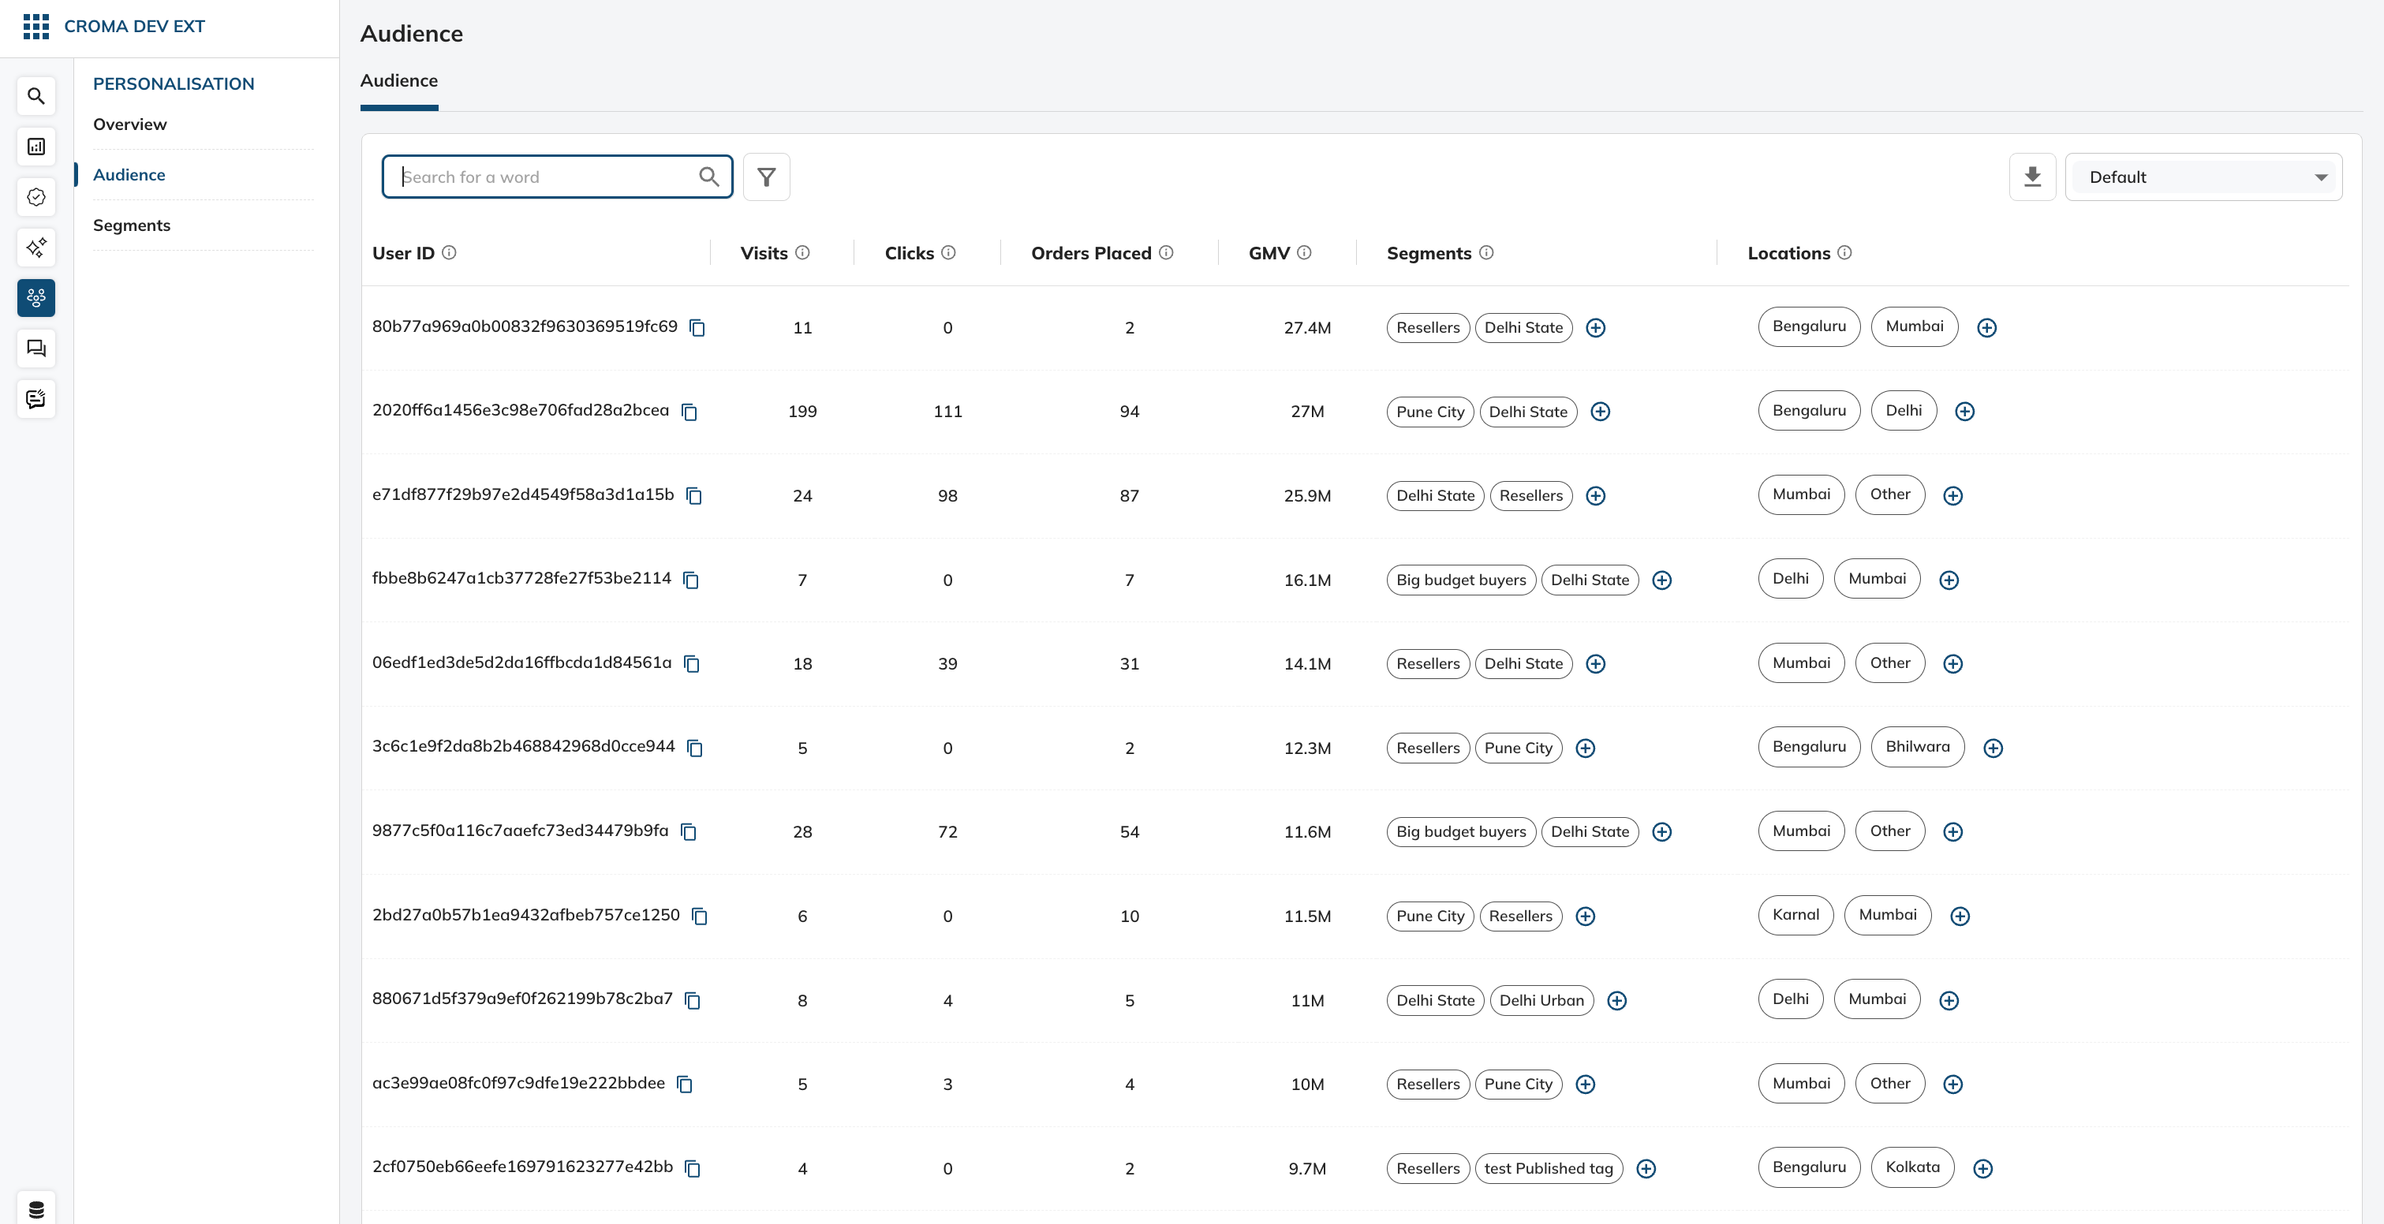
Delve into individual user behaviours, tracking specific actions like cart adds, orders placed, and product views.
Steps:
- Click on the ‘Audience’ tab to see user-level data.
- Use the search bar to find specific users.
- Review the list of users with their associated actions and segments.
- Click on individual User IDs to view detailed statistics, their preferences and segments that they are a part of.
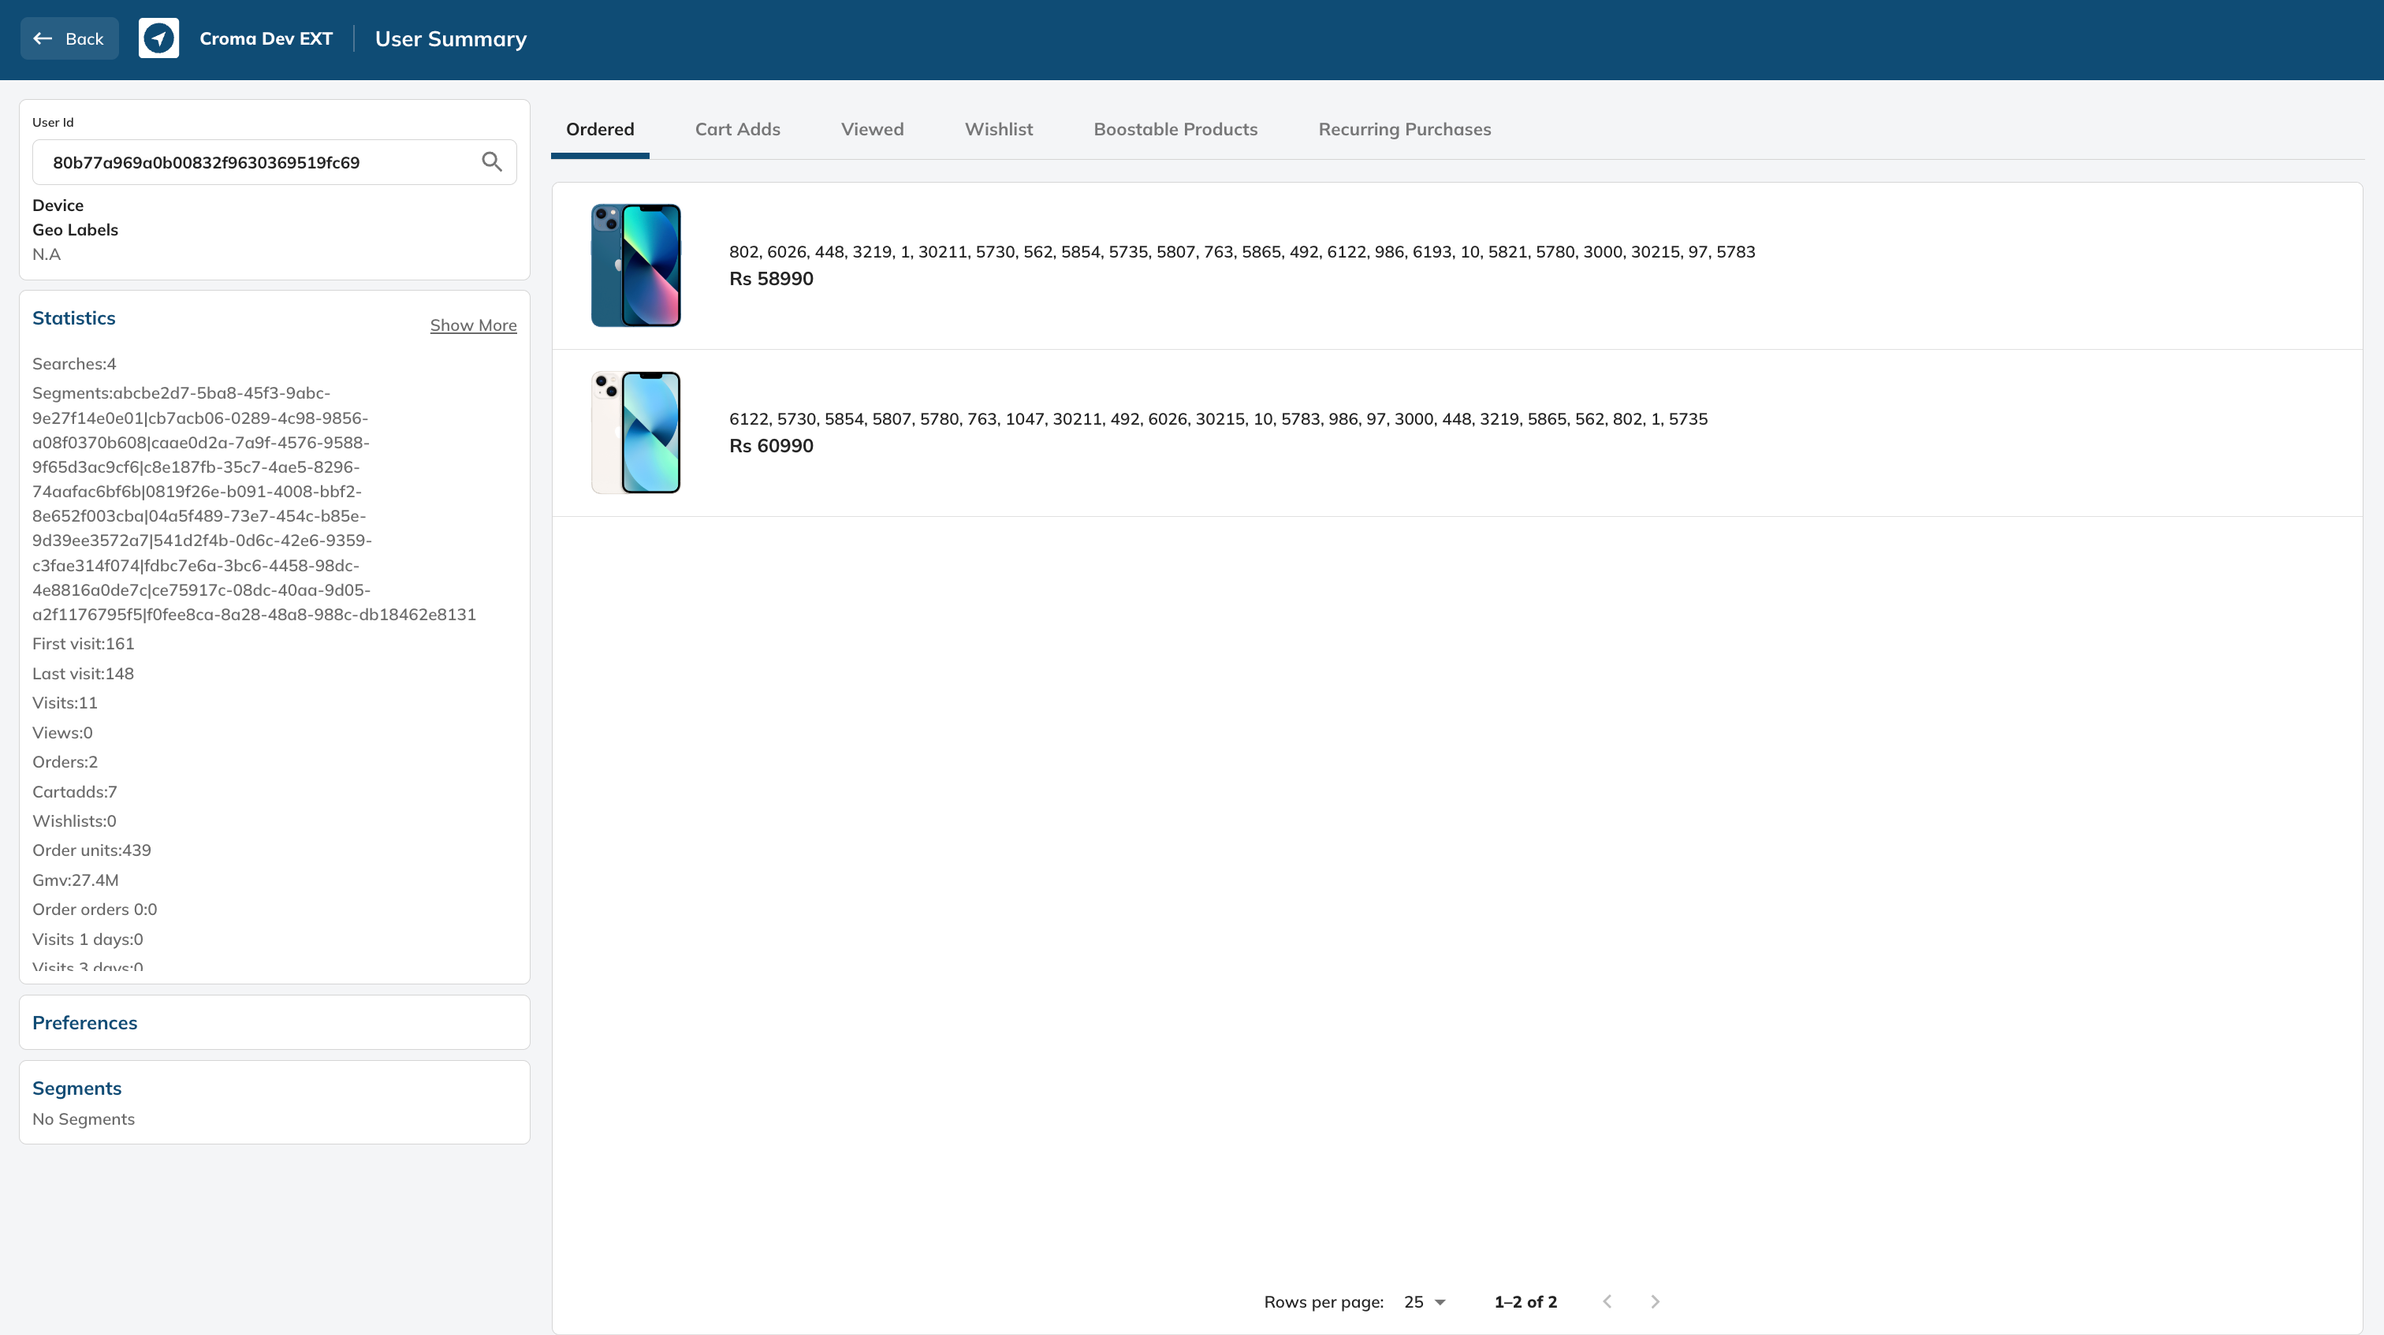
- Customise the data view by sorting or filtering through the available columns.
Segments
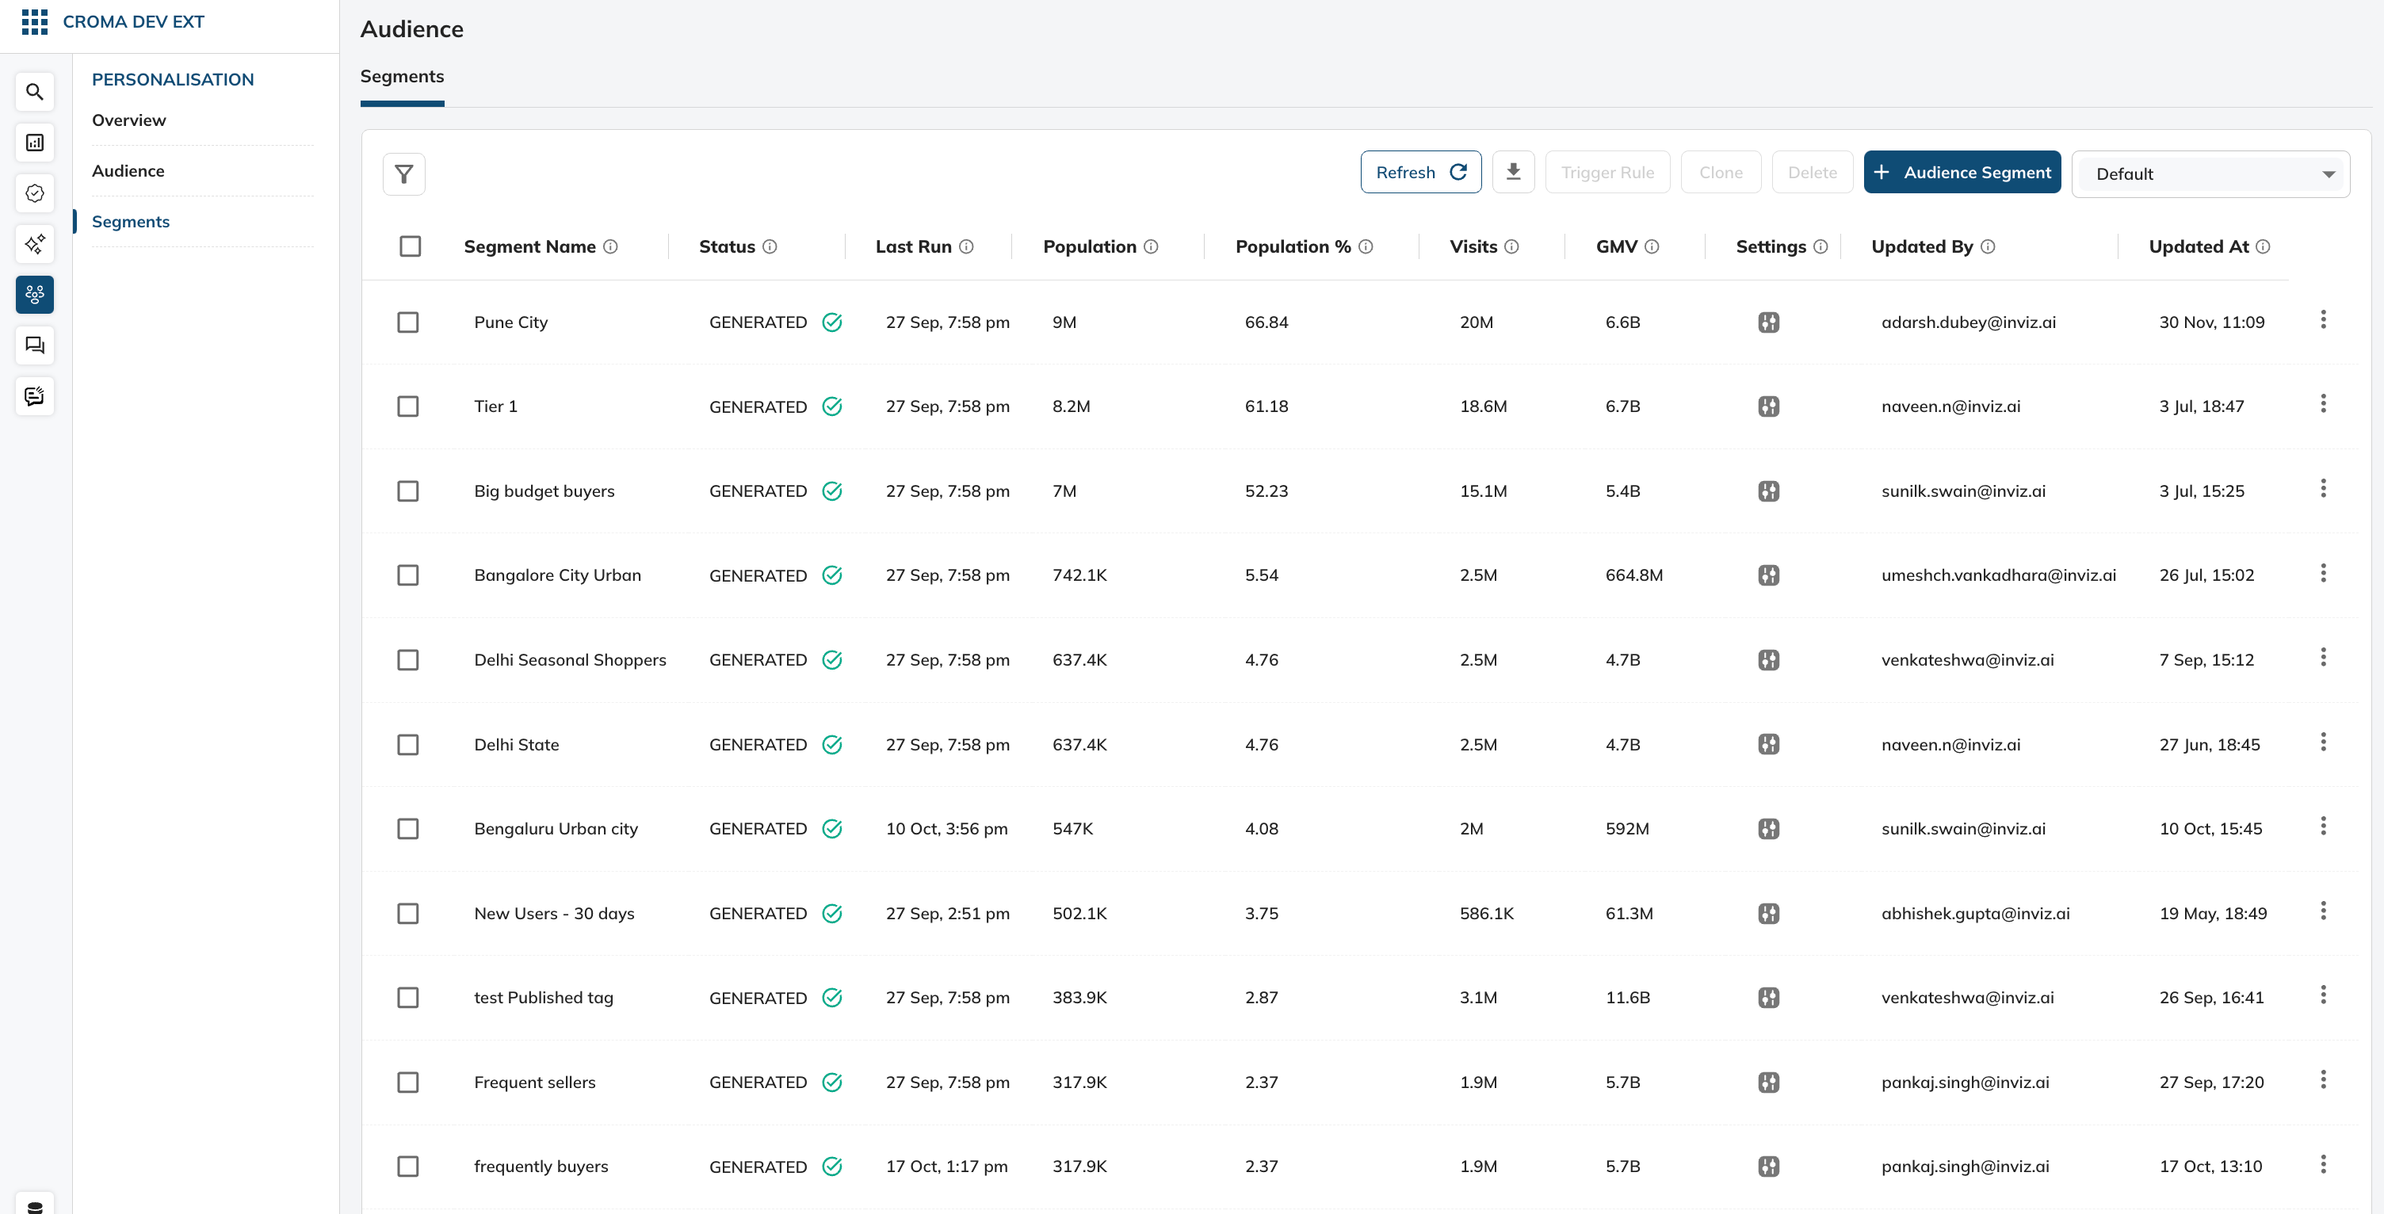
Create and manage user segments based on shared characteristics to better tailor your marketing and product offerings.
Steps:
- Select the ‘Segments’ tab to manage user categorisations.
- View all created segments along with status, population, visits, and GMV.
- Use the ‘+ Audience Segment’ button to create new segments.
- Edit or delete segments using the options next to each segment name.
- Sort segments by various metrics to prioritize your analysis.
Creation of a new segment:
To create a new audience segment using the interface shown in the screenshot, follow these steps:
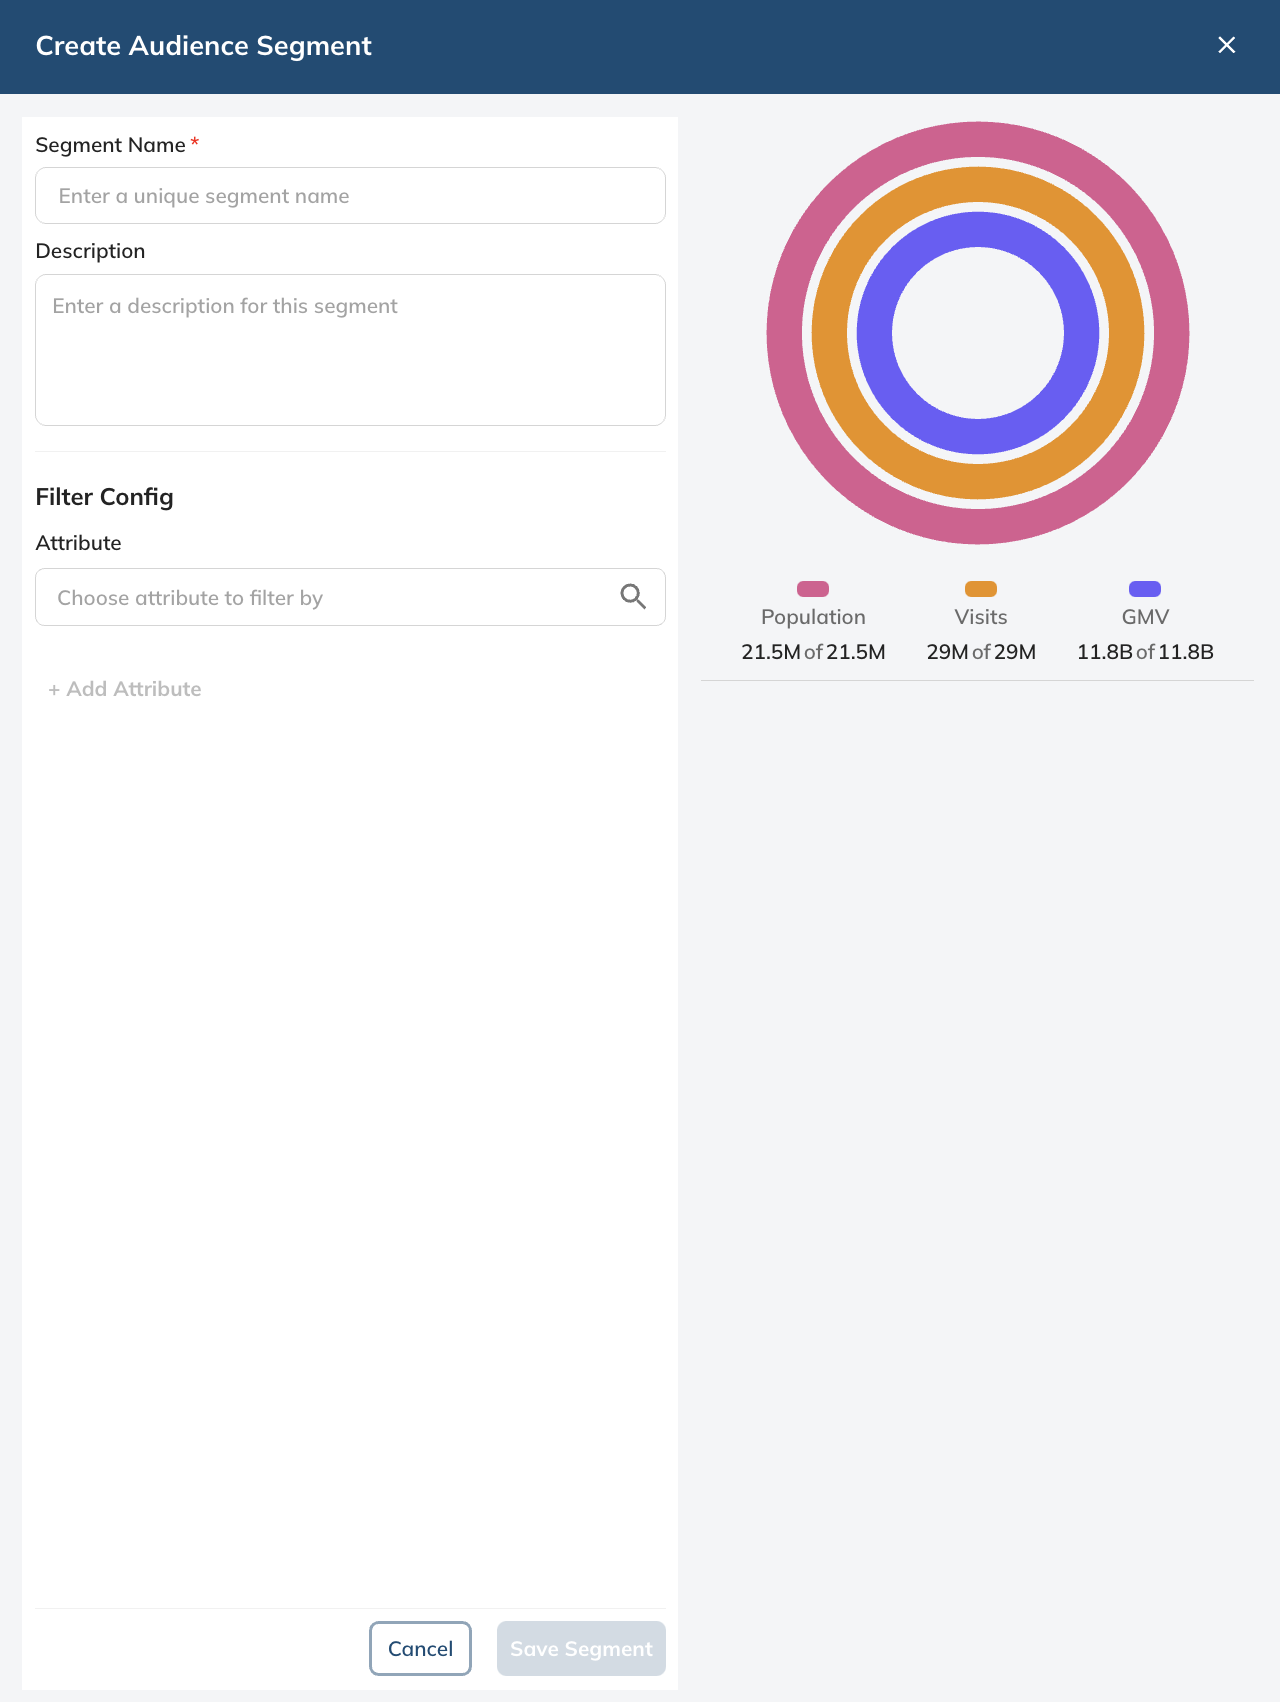
- Segment Name:
Click on the "Segment Name" field.
Enter a unique name for your segment that will help you identify it later. This could be based on the behavior or characteristics of the users you intend to include in this segment.
- Description (optional):
Click on the "Description" field.
Provide a clear and concise description for the segment. This should explain the criteria of the segment or any other important details for quick reference.
- Filter Config:
Below "Filter Config", you will find a list of "Attributes" that can be used to define your segment.
Select an attribute to filter by, such as visits, GMV, etc. These attributes are based on user behaviors like visits or gross merchandise value over specific time frames.
- Visualization Tool:
On the right side, there's a visualization tool representing different metrics such as Population, Visits, and GMV (Gross Merchandise Value).
Use this tool to visually gauge the size of the segment as per the chosen attributes. It provides a quick visual insight into how each attribute contributes to the segment criteria.
- Save the Segment:
Once you have entered the name and description and selected the desired attributes for your segment, click on the "Save Segment" button to create the audience segment.
If you decide not to create the segment, you can click "Cancel" to exit the creation process.
By following these steps, you will be able to create a new audience segment that can be used for targeted marketing, personalization, analytics, or other purposes where audience segmentation is needed.
Segment Statuses Explained:
Created: This status indicates that a segment has been successfully defined and saved. It is assigned immediately after you confirm the segment's parameters by selecting "Save Segment".
Generating: This status signifies that the segment is in the process of being compiled. It becomes active when you initiate the "Trigger Rule", signaling that the system is now aggregating and processing data to establish the segment.
Generated: When the segment has been fully processed and is now active, the status is updated to "Generated". At this point, the segment is live and operational for use in targeted campaigns, analytics, or other personalized engagements.
Updated over 1 year ago