Configuration
User based Personalization
Welcome to the Personalization Configurations screen! This interface empowers you to tailor your personalization strategy with ease and precision.
Usage
Configure Settings: Adapt various settings to align with your business's unique needs.
Go Live with Ease: Save your settings and make them live with just a few clicks.
Navigation Guide
This screen is divided into two main sections:
Section 1: Attributes Settings
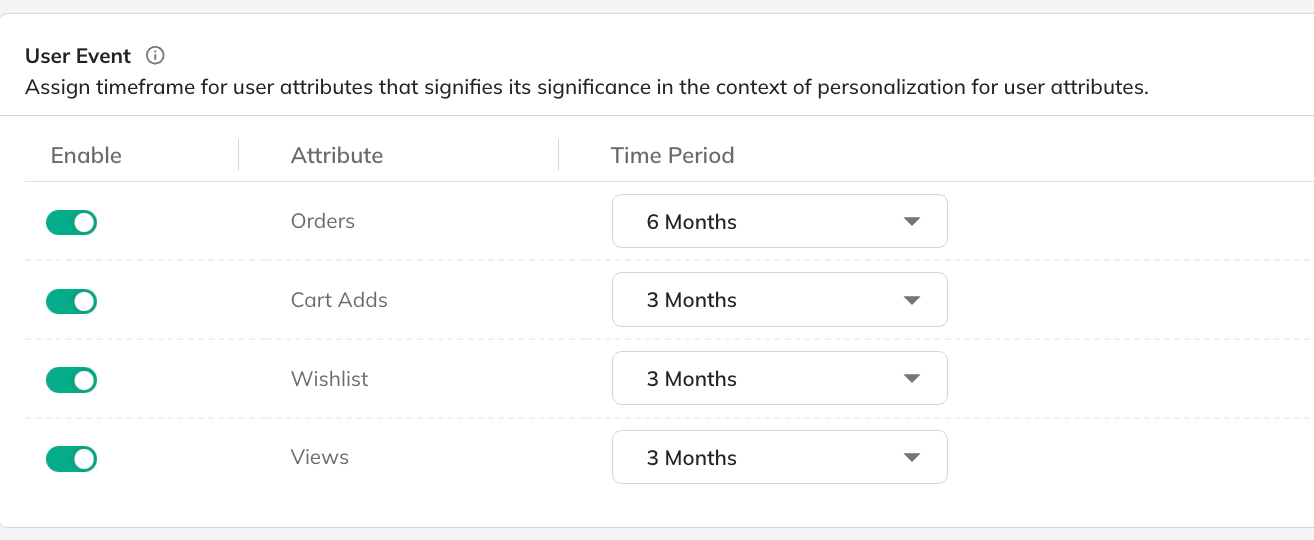
User events are actions taken by your customers, such as 'Orders', 'Cart Adds', 'Views', or 'Wishlist' selections. These are pivotal in understanding customer behavior and preferences.
User Event Settings:
- Select Time Periods Easily: Choose the desired time frame for each attribute using a dropdown menu. Options range from the last 7 days up to the last year.
- Attribute Options: Select from a list including Orders, Cart Adds, Views, Wishlist, and more.
- Minimum Requirement: At least one user attribute must be selected.

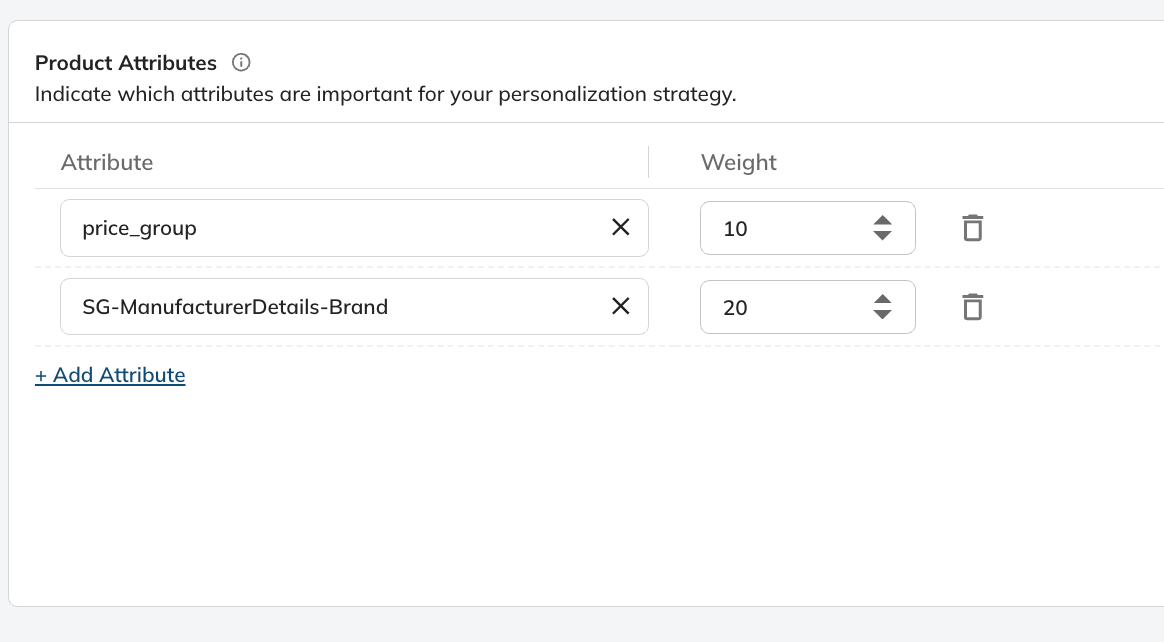
Product attributes are characteristics of your products like price, color, size, or category. These attributes help differentiate your products and can be weighted in personalization algorithms.
Product Attributes Settings:
- Assign Weights: Define the importance of each attribute by assigning a weight between 1 and 100.
- Custom Attribute Addition: Add any attribute from your search schema.

Saving and Triggering Changes:
- Save Settings: After configuring, click “Save Settings” to store your inputs.
- Go Live: Click “Trigger” to apply your configurations. This will also initiate a job re-run.
- Trigger Button: This button is initially greyed out and becomes active once the settings are saved and modified.
Section 2: Display Settings
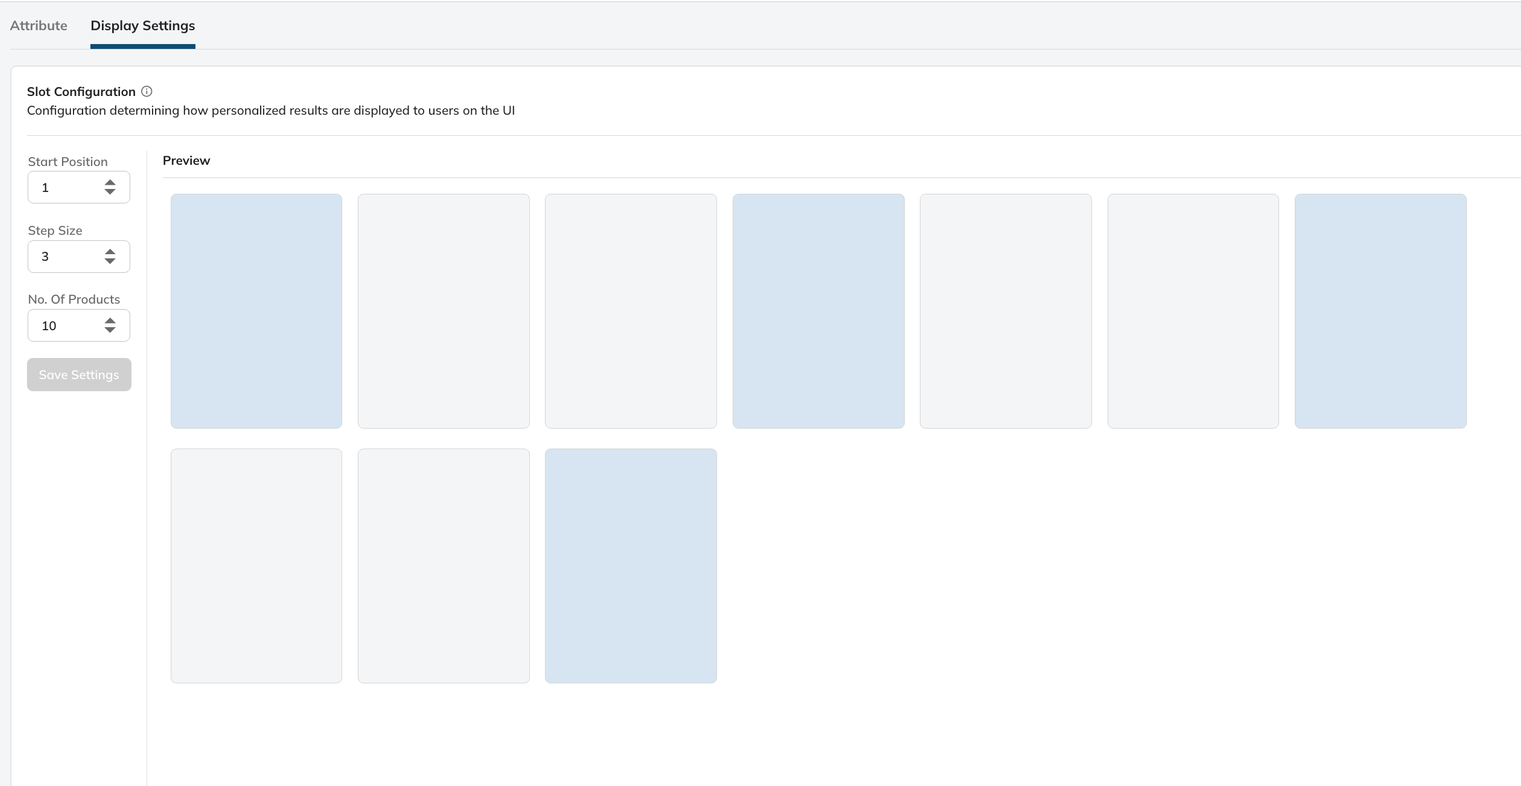
Slot Configuration: The configuration settings that govern the manner in which personalized results are showcased to users on the user interface, defining the specific parameters and elements influencing the display of individualised content.
Define steps for Slots to decide the display positions of personalized products.
- Start Position: Choose the starting point for personalized product displays.
- Step Size: Define the gap size between the personalized listing positions.
- Product Display Range: Set the number of products to show on the first ranking page (between 1 and 20).
- Preview: This shows the positions where the personalized products will be shown on the listing page.

Updated almost 2 years ago